
I used the Ink Blooms stamp and die set again for this card. It is amazing what a different look you can create with the same product. Have a look at the last card that
I used the Ink Blooms stamp and die set again for this card. It is amazing what a different look you can create with the same product. Have a look at the last card that I made using this same set.

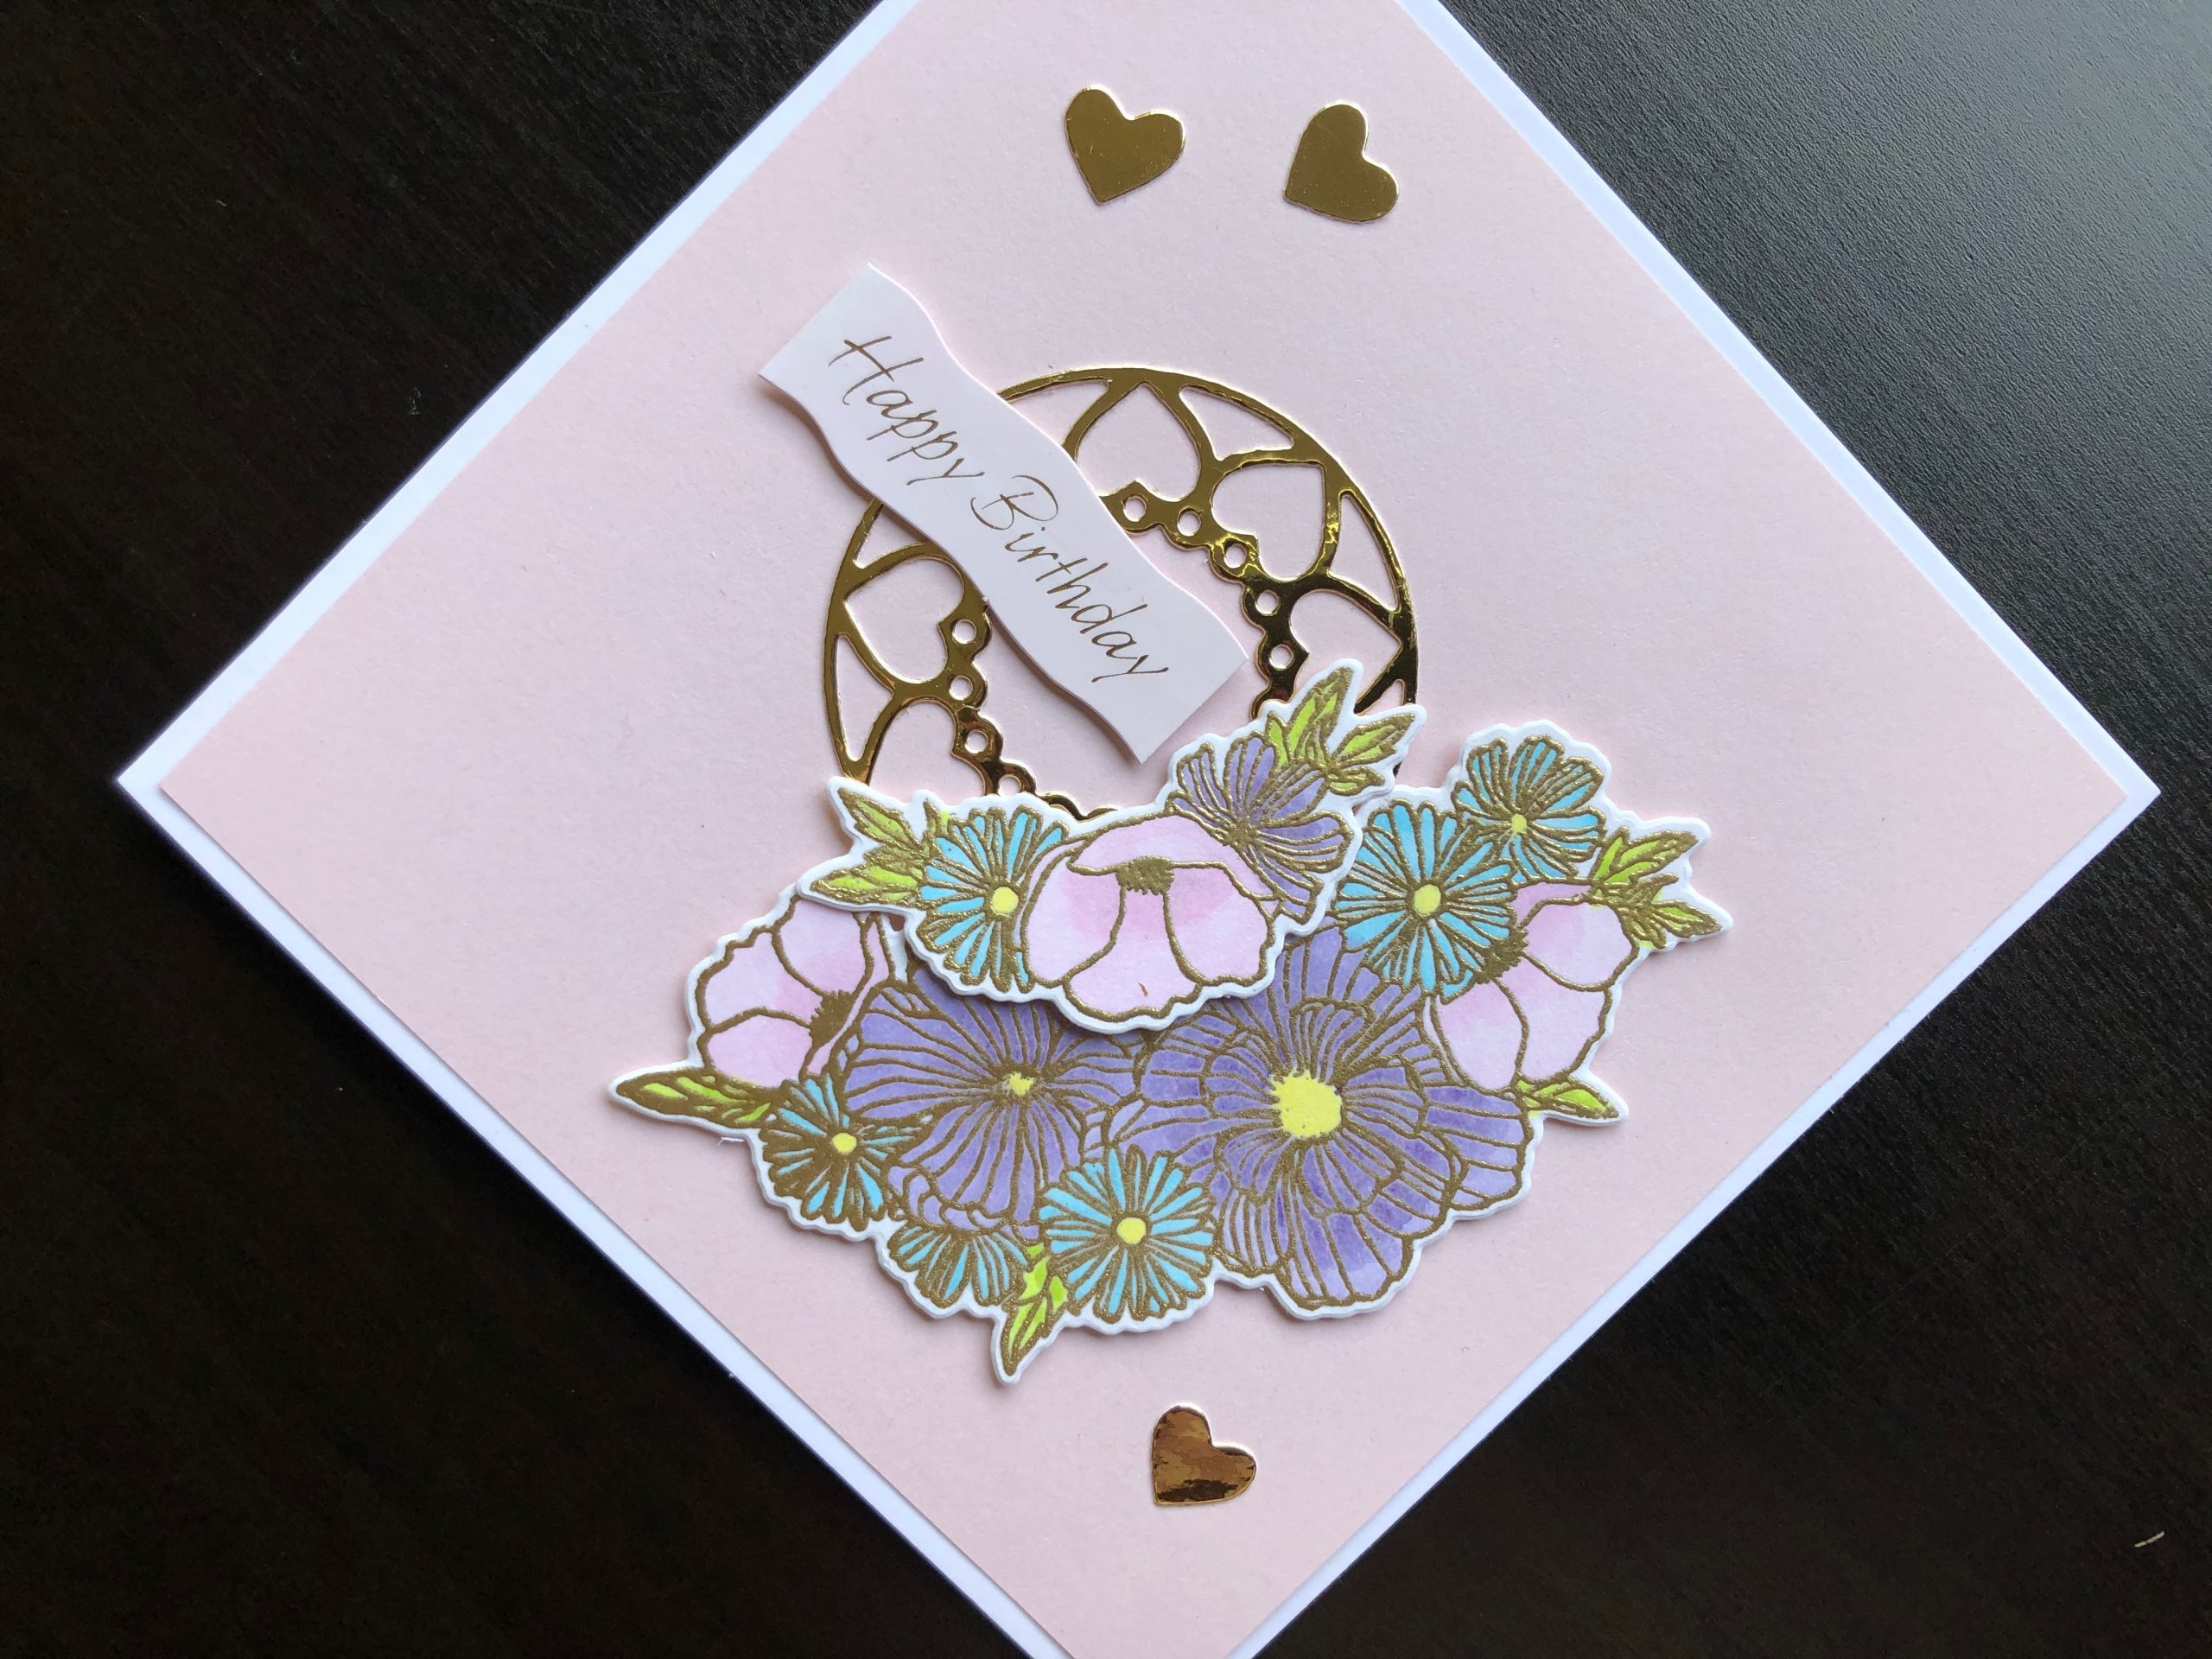
To Make the Card
Start with a 5 x 5 inch square white card blank, layer this with pastel pink card.
Die cut Layer A from the Adora die set in gold mirror card. Take the smaller circle and adhere this on the card front slightly towards the top left corner.
Stamp both the large and smaller flower clusters in embossing ink on white card and heat emboss in gold. Colour the flowers with marker pens or pencils in pastel colours. Use the dies included in the set to die cut both flower clusters. Use adhesive foam pads to attach the flowers to the card, slightly overlapping the gold die cut circle.
Cut the birthday greeting out of the sheet and use a sanding block to smooth away the notches that attached it. Use the same pink colour as the flowers to colour the white background of the sentiment. Attach this with 1mm adhesive foam pads across the left side of the die cut circle. Add two or three gold hearts from the die cutting to finish off.
I love the look of the gold embossing with the pastel colours, it makes a very pretty, feminine card.
Thanks for calling in, I hope you like what you see. All the products are linked below.
Products used:
- White 5 x 5 inch white blank card
- Pale pink card
- A4 smooth white card
- Gold mirror card
- Adora layering die set
- Ink Blooms stamp and die set
- Big Shot die cutting machine
- Marker pens or pencils
- Slow drying embossing ink
- Gold Rich embossing powder
- Folding heat gun
- Die Cut White and silver birthday greetings
- Craft tacky glue
- 1mm adhesive foam pads