
Hi Everyone, here’s a bright fresh birthday card with a modern look. I had planned to add some glitter paste to the stencilled areas but liked the look of it without when I had done
Hi Everyone, here’s a bright fresh birthday card with a modern look. I had planned to add some glitter paste to the stencilled areas but liked the look of it without when I had done so I will save that for another time.

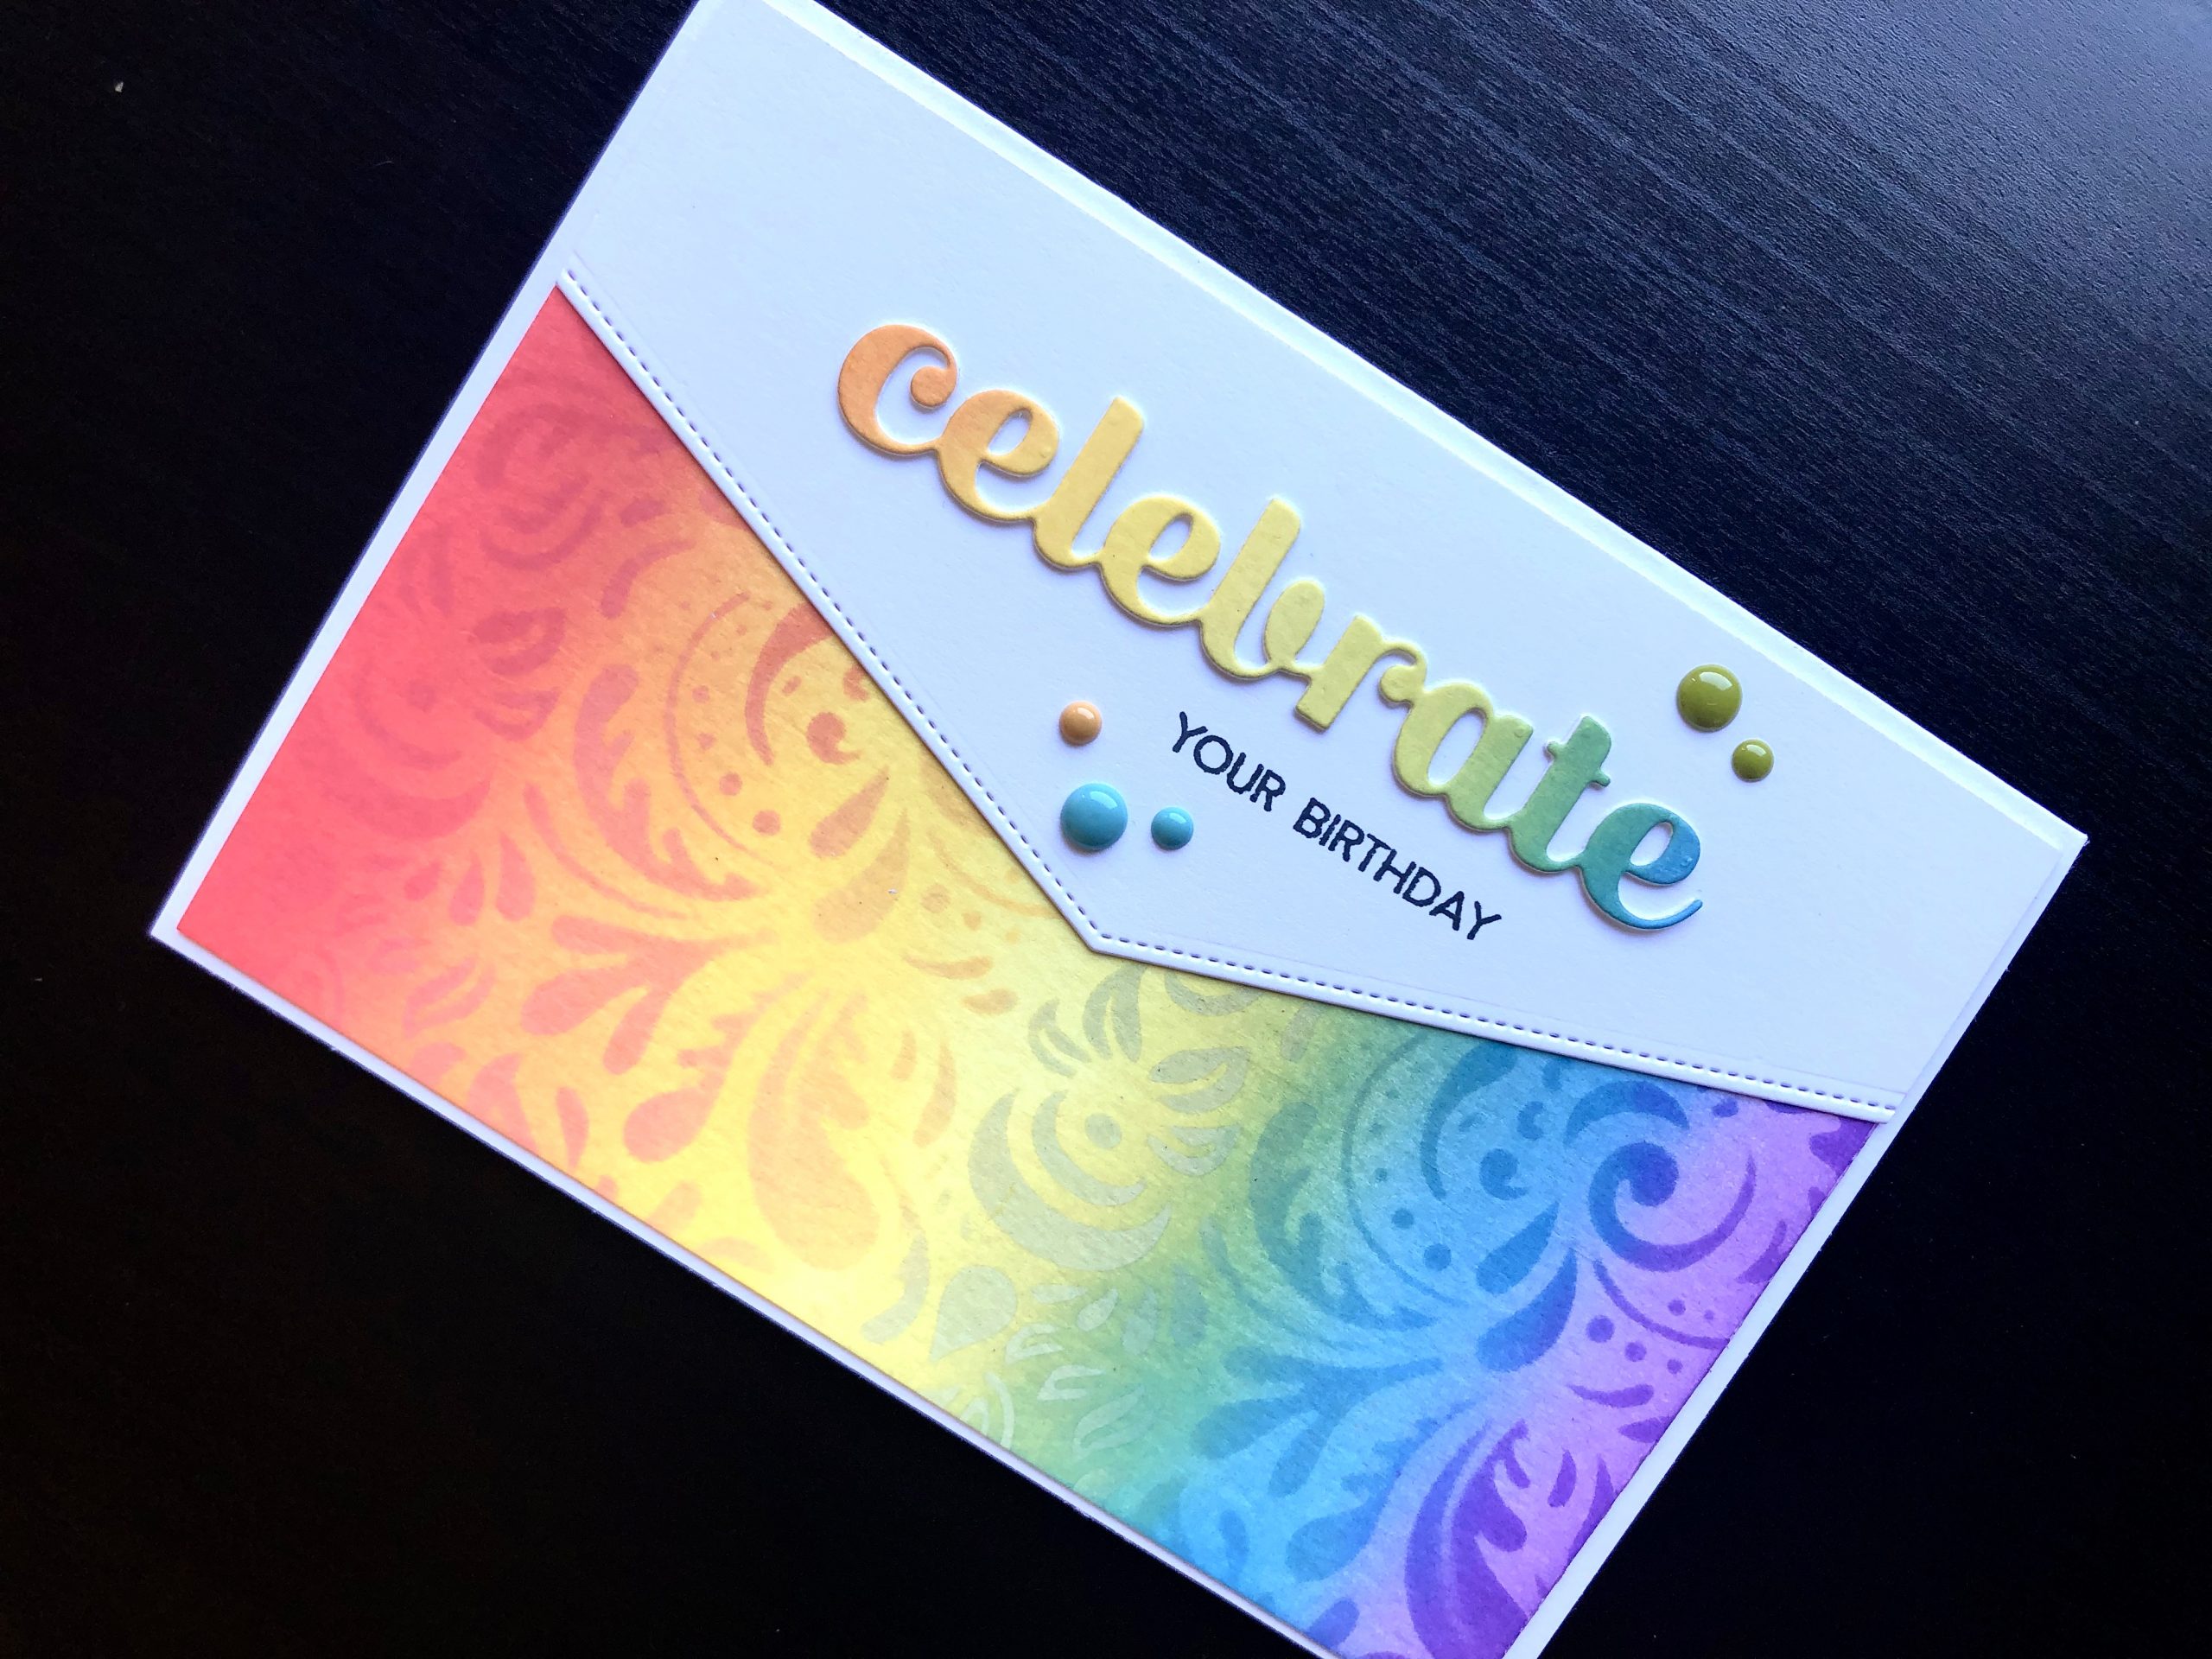
To Make the Card
Start with an A6 blank card, cut a piece of watercolour card slightly smaller than the card blank.
Using rainbow colours (see below), ink the watercolour card in stripes, keeping the ink fairly light. Place the stencil over the bottom two thirds of the inked area, use removable stencil tape to hold it in place, then ink over each colour again with the same colour, applying it more heavily this time.

Die cut the word Celebrate from the top part of the inked card where it is not stencilled. Cut a piece of white card the same width as the watercolour card and die cut a stitched V shape, big enough to cover the un-stencilled area of the card. Stamp the words Your Birthday on the white piece, then adhere it to the card front.
Cut the word celebrate again, this time in plain white card and glue the coloured one on top of it to add some depth to it. Adhere this to the white portion above the stamped part of the message. Add some co-ordinating enamel dots around the greeting.
I really like the way the double inking using a stencil adds a subtle design to the inked area and the sharp contrast created by the bright colours and the white card. This one is for my daughter so I hope she likes it too. Thank you for calling in.
Debbie x
Supplies used:
- White A6 blank card and envelope
- A4 Watercolour card stock
- A4 smooth white card
- Foam ink blending tool
- Distress Oxide ink pads, Candied Apple, Spiced Marmalade, Fossilised Amber, Twisted Citron, Salty Ocean, Wilted Violet, Black Soot
- Celebrate Sugar Script die
- Select a Size edge dies
- A5 Baroque stencil
- Happy Sentiments clear stamp set
- Stencil tape
- Craft tacky glue
- Double sided tape runner
- Echo Park I Love Family enamel dots