
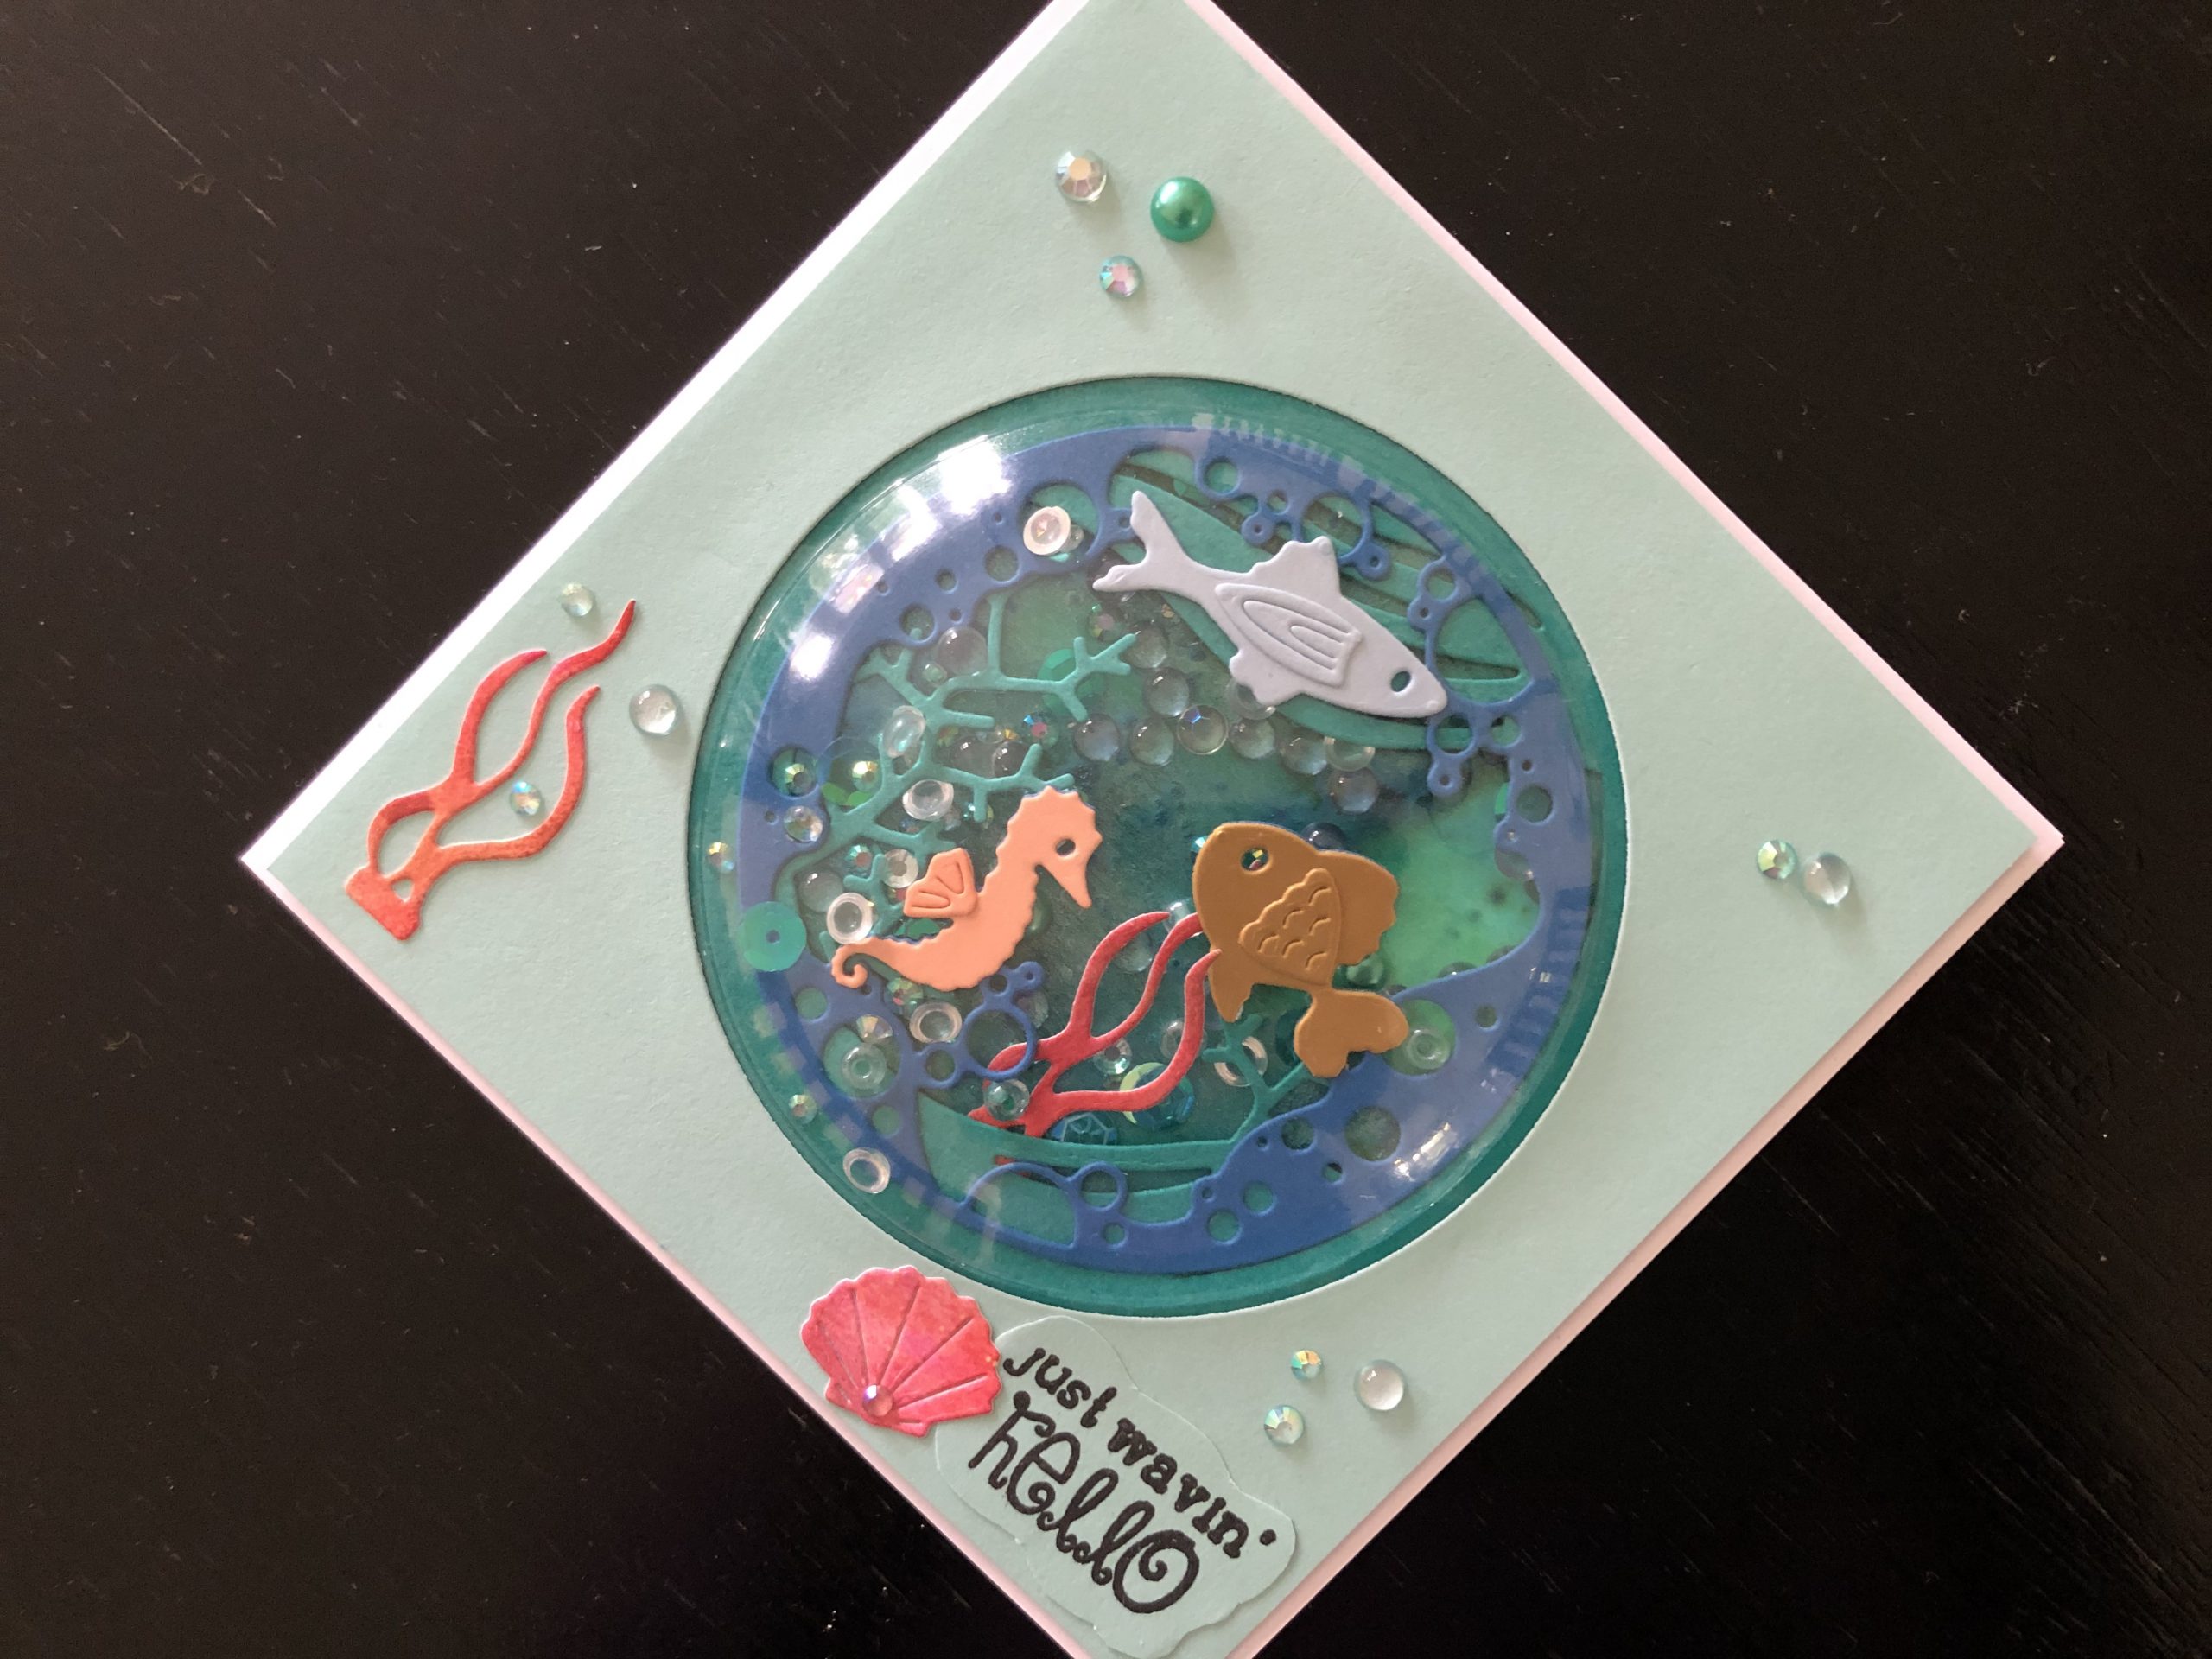
Hi everyone, I haven’t made a shaker card for ages, but as soon as I saw the new Ocean Scene die set from Sizzix I knew that’s what I wanted to do. The way the
Hi everyone, I haven’t made a shaker card for ages, but as soon as I saw the new Ocean Scene die set from Sizzix I knew that’s what I wanted to do. The way the dies layer up immediately creates a feeling of depth and the clear plastic shaker dome accentuates it.

To Make The Card
Spritz a piece of white card approx 12cm square lightly with water, then sprinkle with green and blue Pixie Powder. Spritz again to activate the powder and dry with a heat gun. If necessary repeat the process until you have covered the central area and have a good mixture of colour. This creates the background for the shaker dome. Adhere this background to a 5 x 5 inch white blank card.
Cut a piece of dark turquoise card to approx. 12cm square, use the die with coral and waves to cut the design into the centre of the card. Take a piece of blue card, use the die with seahorse, with the circle die to cut this design. Use various colours of card to cut out the seahorse, fish and shark and adhere them over the ones on the blue layer. Use a deep pinky orange card to cut two pieces of seaweed, and a shell.
Take a piece of light turquoise card and trim it to 12cm square, die cut a circle from the centre approx. 8.6cm, big enough to fit over the shaker dome. At this point you can stamp the greeting directly onto the the bottom right corner of the light turquoise piece. I forgot to do this and had to stamp it onto a separate piece which I hand cut with wavy edges to add later.
You now have all the elements of the card so it’s time for assembly. Adhere the blue layer to the dark turquoise layer. Check the positioning of the shaker dome and glue that into place. At this point it’s best to rest a book or something on the shaker dome to press it in place until the glue is completely dry. I left it overnight.
Put a small pile of the Sparkletz in the centre of the card, then adhere the shaker dome piece over it. Adhere the light turquoise layer over the shaker dome, and if you haven’t already, add the sentiment. Glue the shell next to the sentiment and the Seaweed in the opposite corner. Add bubbles and crystals from the Sparkletz around the card to finish it off.
I love the 3D effect of the layered die cuts. The Sparkletz are the perfect addition for decoration and inside the shaker dome. Thank you for dropping in, I hope you like the card. All the products that were used are linked below.
Debbie x
Supplies used:
- White 5″ x 5″ blank card and envelope
- Various colours of card
- A4 white card
- Pixie Powder Aqua Lagoon and Peacock Green
- Sizzix heat tool
- Ocean Scene die set
- Big Shot die cutting machine
- Small round deep shaker dome
- Seashore Sentiments clear stamp set
- Versamark Onyx Black ink pad
- Sparkletz Sea Level embellishments
- Double sided tape dispenser
- Woodware Crafty glue