
Hi everyone, not a card for a change! For a while I have wanted to try putting two shaker domes together to try and make a Christmas bauble, when the new Christmas Bauble die set
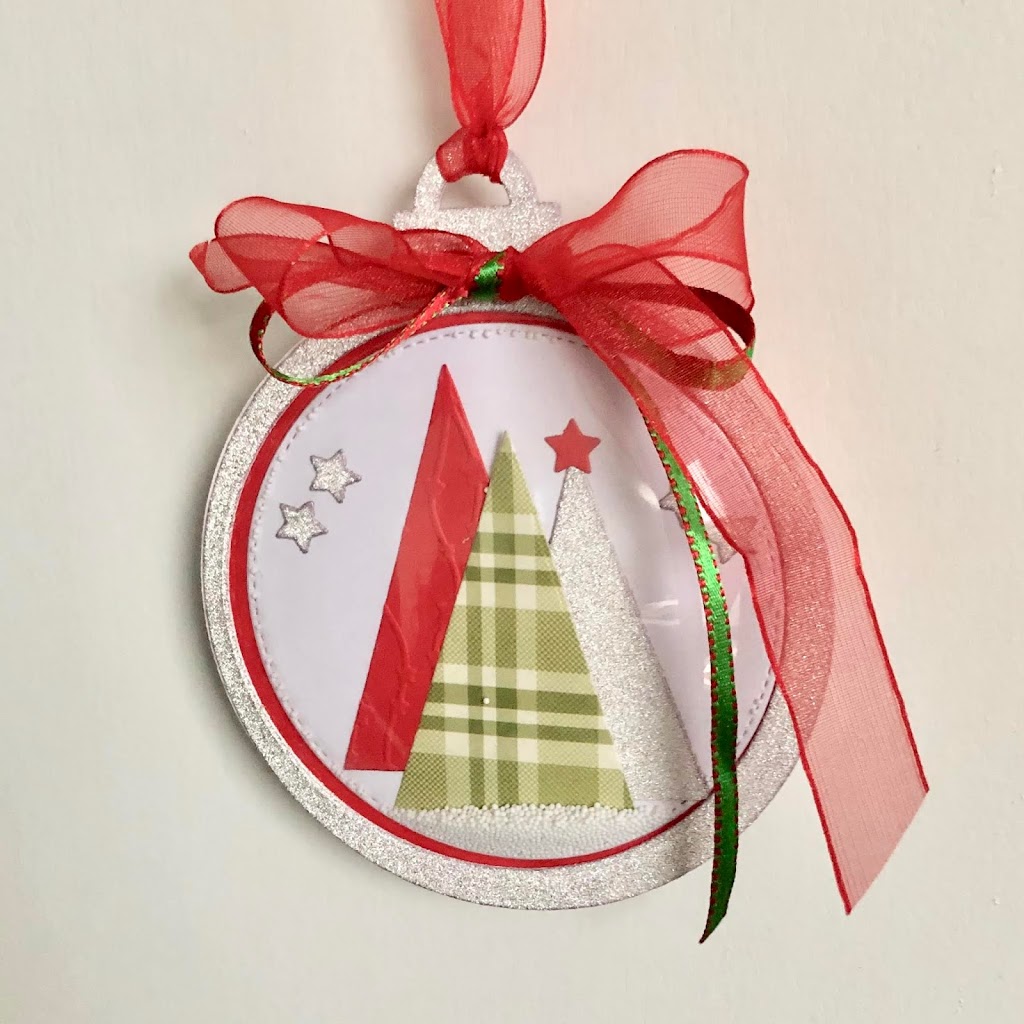
Hi everyone, not a card for a change! For a while I have wanted to try putting two shaker domes together to try and make a Christmas bauble, when the new Christmas Bauble die set arrived last week I discovered to my great joy that the smaller of the two circle dies that are included fits over our medium sized shaker domes perfectly so I can cut a bauble shaped frame complete with hanging loop to neatly cover the rim of the shaker dome – things don’t usually work out so well!!


Apologies for the poor quality photos but it’s very hard to get a photo of a plastic dome without some reflection, anyway I am sure you get the idea of what I did from these pics. For the two sided bauble some things need to be die cut twice, I even cut two red circles as the plates in my die cutting machine are very worn and leave a scruffy pattern on the back of everything! So I cut two red circles, two bauble frames, two bauble hanging loops. Then I cut one white circle with stitched edging, white, silver glitter and green snowflakes in different sizes, three triangular trees in different colours and some stars.
To assemble the bauble I glued the red circles back to back, glued the snowflakes on to one side along with the Christmas Wishes die cut greeting and the white circle, trees and stars on to the other side. I also embossed the red tree to add some texture. I wanted to add some white micro beads into the Christmas tree side so that it is like a shaker card, I carefully put some in the centre of the circle, put glue all round the rim of the first shaker dome and glued it in place. I did this side first so that I could apply plenty of pressure to make sure that the shaker dome was securely in place all the way round and my ‘snow’ didn’t leak out. Once that was secure I glued the second shaker dome in place on the other side then glued the bauble border over them on either side and a hanging loop on either side. All that remained was to add a bow and hanging loop.
After thinking about this for a while it turned out to be remarkably easy once I had the bauble die set, the hardest part was deciding what to put in each side! Thank you for visiting I hope you like it and will give it a try yourself. All products used are linked below.
Debbie x
Products used:
- Festive Shades A4 card pack
- Non Shedding Glitter Card Silver
- Christmas Wishes 12 x 12 inch paper pad (for the green gingham paper)
- Three Christmas Trees die set
- Snowflake Quartet die set
- Round Bauble die set
- Star Stream embossing folder
- Stitched Circles die set
- Red Organza ribbon
- Red and Green Stitched Edge ribbon
- White opaque micro beads
- Scandi Style Die Cut Christmas Greetings
- Craft tacky glue