
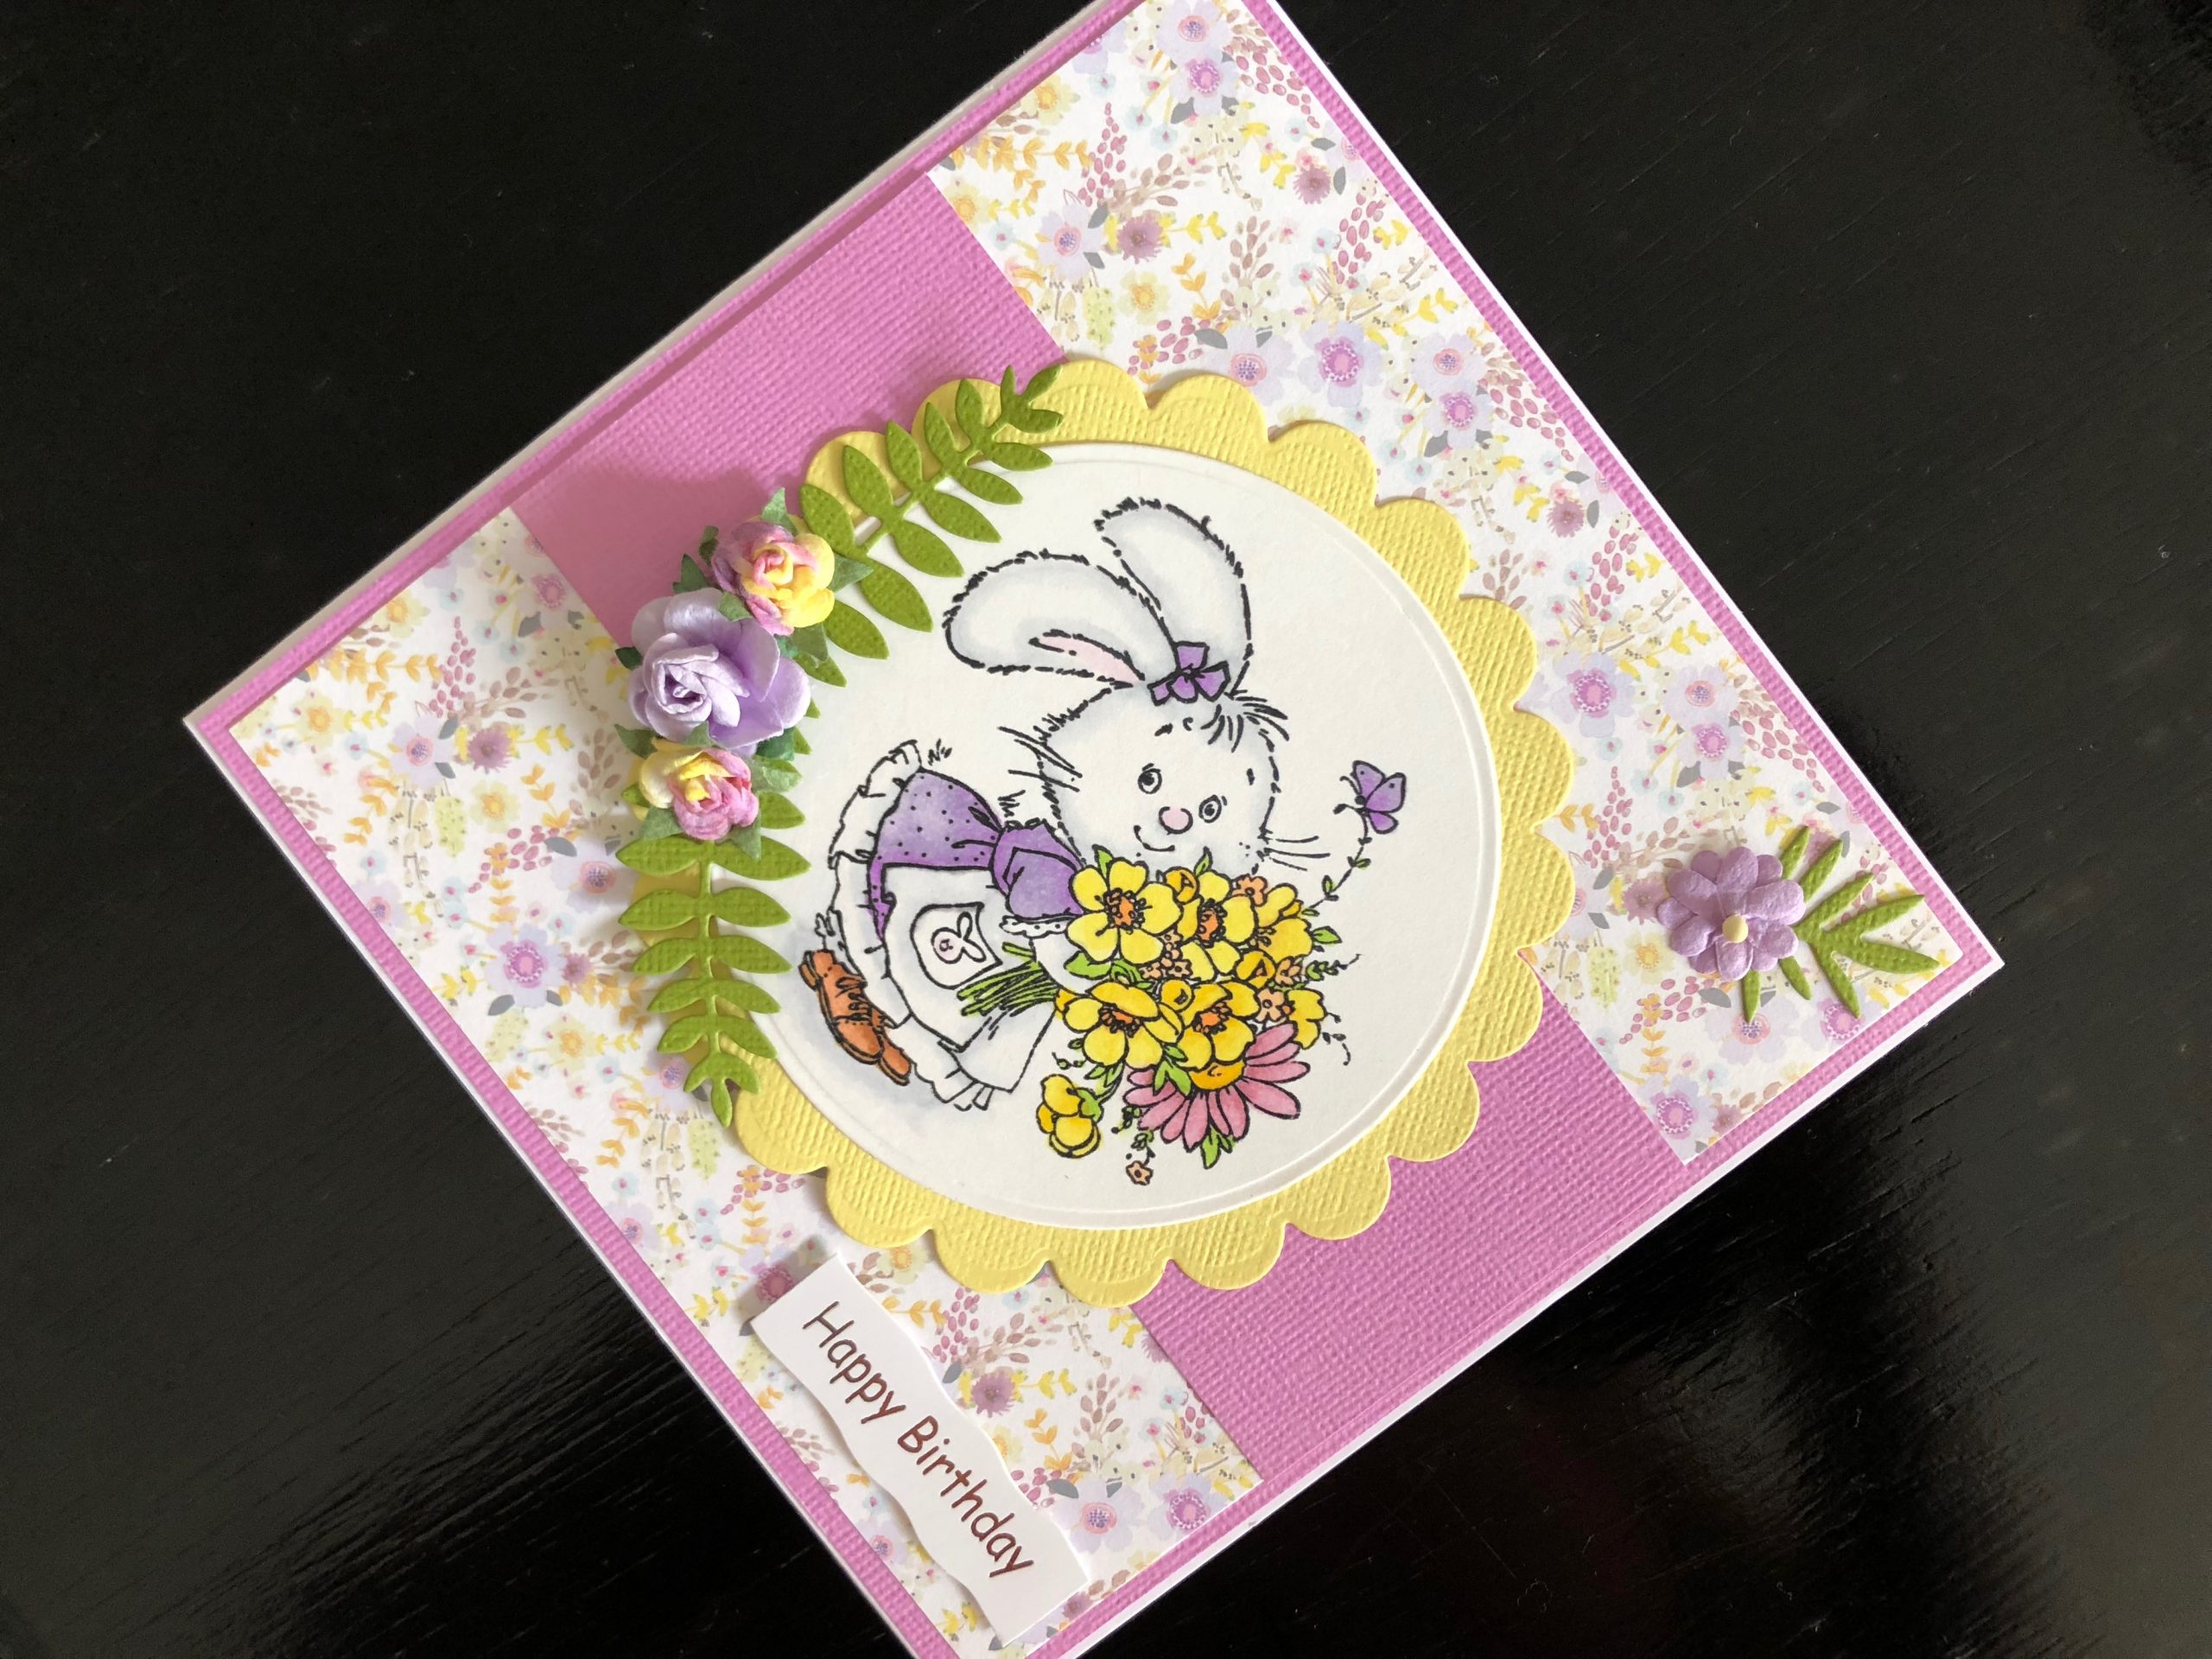
Hi everyone, I love this cute little bunny rabbit with her bunch of flowers and thought it would be perfect for a spring time birthday card. I have used it for a Mothers Day card
Hi everyone, I love this cute little bunny rabbit with her bunch of flowers and thought it would be perfect for a spring time birthday card. I have used it for a Mothers Day card in the past which worked well too. I love the colours in this card, they are so fresh looking.

Start with a 6 x 6 inch (14.75 x14.75cm) white blank card, trim pink card to 14.5cm square and patterned paper to 14cm square, layer these onto the card blank. Cut a strip of pink card to 6 x 14cm and adhere across the middle of the card.
Stamp the bunny rabbit in black ink on white card and colour with marker pens or colour pencils, die cut the stamped image into a circle shape. Die cut a scalloped circle from yellow card, adhere the stamped image to the centre of it and adhere this in the centre of the card over the pink strip.
Die cut two long leaf stems and one shorter one from green card, adhere the two longer ones to the bottom left part of the stamped image. Cut the wire stems off a lilac paper tea rose and two pink and yellow smaller roses. (I used a pale lilac marker to over the pink part of the roses so that they would match the pinky/purple card and colouring on the rabbit). Adhere the roses on top of the leaf stems with the bigger one in the middle and the smaller ones either side.
Cut the shorter leaf stem in half and adhere it to the top right hand corner of the card with a lilac paper flower on top.
Pop a white and silver Happy Birthday greeting out of the A4 sheet, use a fine sanding block to smooth away any notches and use 1mm adhesive foam pads to stick this to the bottom right hand corner of the card.
All done 🙂
Please let me know what you think in the comments at the bottom, hope you like it. Thanks for reading.
Debbie x
Debbie x
Supplies used:
- 6 x 6 white card blank and envelope
- pink, yellow and white card
- Paper Flowers 6 x 6 paper pad
- Adhesive tape dispenser
- Rabbit with Flower Bouquet clear stamp set
- Marker pens or colouring pencils
- Circle Frames die set
- Scalloped Circles die set
- Foliage 2 die set
- 25mm Lilac Mulberry paper roses
- Pink and Yellow Mulberry paper roses
- Lilac paper flowers
- Die Cut Birthday Messages silver