
Hi Everyone, here’s a lovely summery birthday card with a colour scheme inspired by some orange lilies at the bottom of my garden. To Make the Card Start with a white A6 blank card, use
Hi Everyone, here’s a lovely summery birthday card with a colour scheme inspired by some orange lilies at the bottom of my garden.

To Make the Card
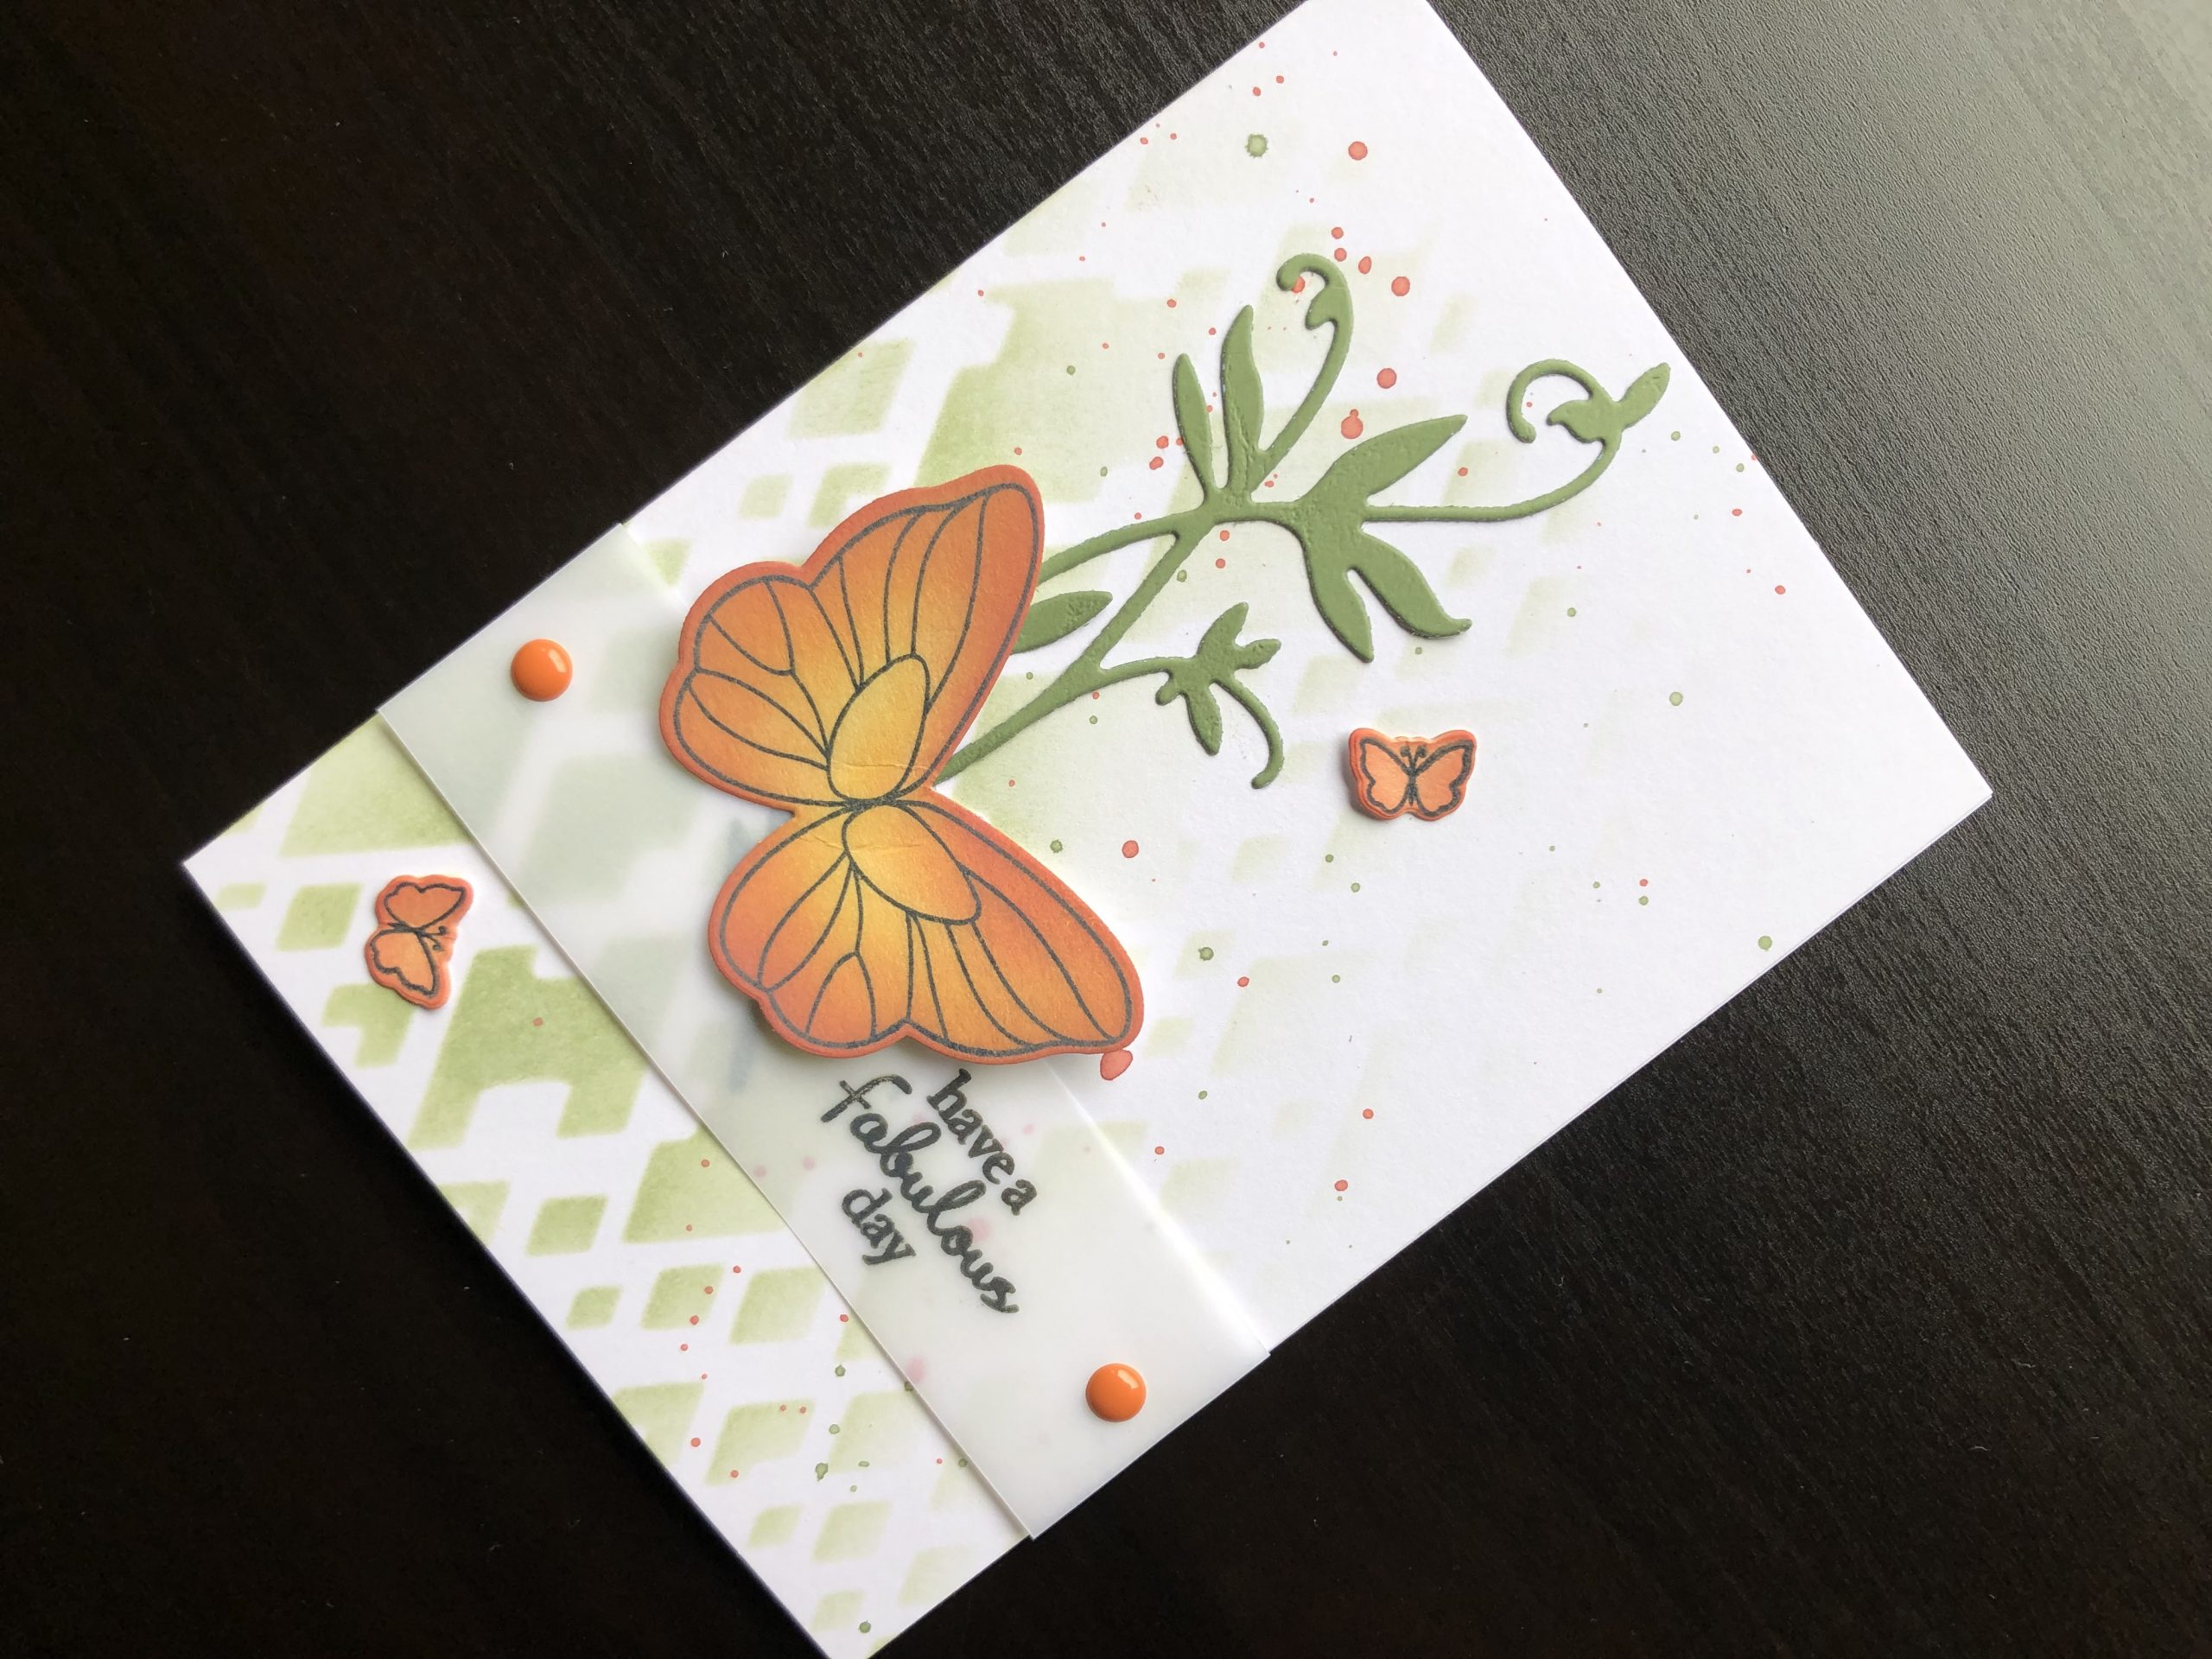
Start with a white A6 blank card, use stencil tape to tape the card to the work surface and to fix the stencil in place. Apply ink to the stencil with a stencil brush starting in the bottom left corner of the card. Apply the ink more heavily at first, fading it out to nothing as you work across the card.
Smoosh a small amount of green and orange ink onto a craft mat and spritz with water, pick a small amount up on a paintbrush and flick it across the stencilled background. Leave to dry or set with a heat gun.
Stamp a large butterfly in black ink and colour with Spiced Marmalade, use Fired Brick around the edges. Stamp, cut and colour two small butterflies. Die cut a leafy stem from green card and adhere to the background. Cut a strip of white vellum and stamp the greeting towards the right hand end, use 1mm adhesive foam pads to adhere the vellum across the card front, overlapping the bottom of the leaf stem. Add enamel dots to each end of the vellum strip, this is not only decorative, but also stops the adhesive pads from showing through the vellum.
Attach the large butterfly where the leaf stem meets the vellum and the smaller butterflies above and below. Use extra strong double sided tape to attach the butterfly to make sure that it stays in position.
I am very happy with the way this turned out, I like the way you can still see the stencilling through the vellum and the orange and green work very well together. Thank you for visiting, I hope you like it too. All products used are linked below.
Debbie x
Supplies list:
- White A6 blank card
- Diamond Mesh stencil
- Stencil tape
- Bundled Sage Distress ink pad
- Stencil brush
- Pure white vellum
- A4 smooth white card
- Butterfly stamp and die set
- Garden Branch Flourish die
- Distress Oxide ink pads, Spiced Marmalade, Fired Brick
- Versafine Onyx Black ink pad
- Craft tacky glue
- Extra strong double sided tape
- 1mm adhesive foam pads
- I Love Family enamel dots
- Foam ink blending tool