
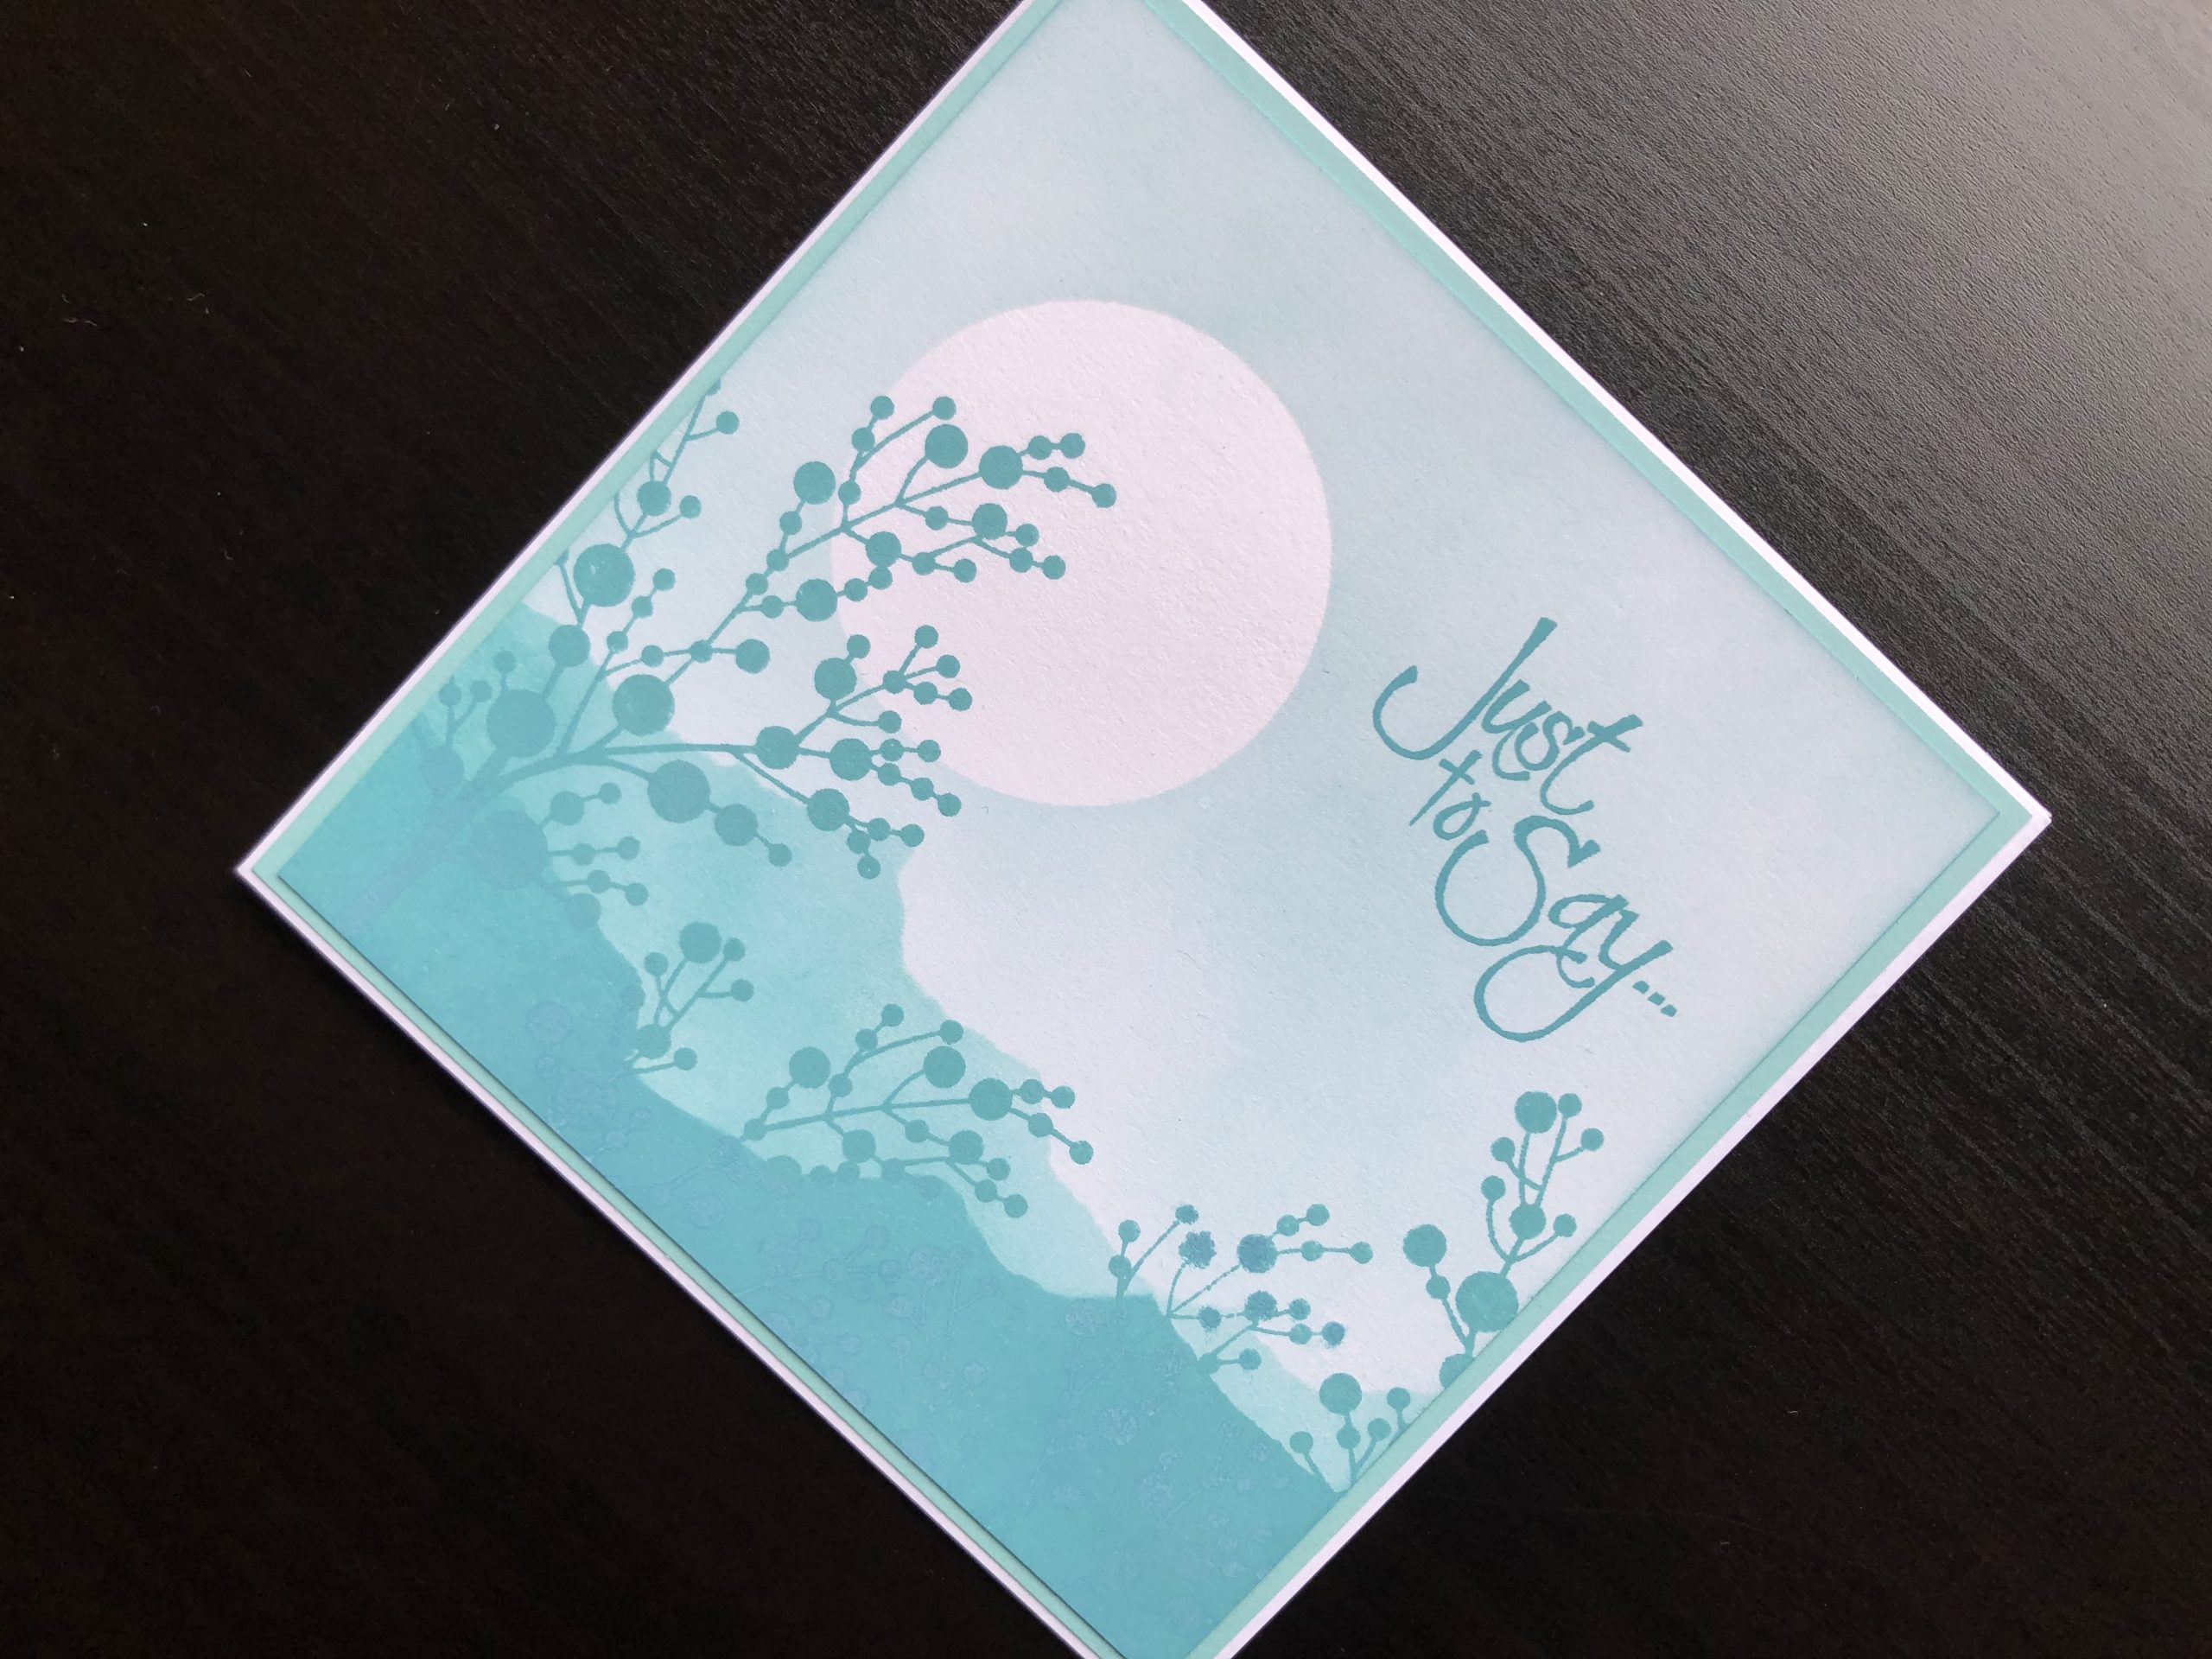
This card is a bit of a departure for me as it uses only one colour of ink and is completely 2 dimensional. I have seen quite a few pictures of cards made this way
This card is a bit of a departure for me as it uses only one colour of ink and is completely 2 dimensional. I have seen quite a few pictures of cards made this way and have been keen to try it for myself. It took a couple of tries to get the layout right but in the end I think it is OK.

To Make the Card
Start with a 12.5cm square white blank card and layer it with turquoise card. Cut a piece of white card, approximately 12cm square. Die cut a circle from a sheet of masking paper and adhere it to the card where you want the sun to be.
Use a foam ink blending tool to lightly ink all over the card, taking care not to lift the edges of the circular mask. Ink from the bottom up so that you don’t make it too dark nearer the top. Tear masking paper to make the first line of mountains, these are the ones closest to the sun. Again ink from the bottom up adding a bit more colour this time. Tear another strip of masking paper to make the second row of mountains below the first. Ink from the bottom up again adding quite heavy colour.
Remove all the masking paper and you should have your background scene. Use the same colour of ink stamp the silhouette branches, allowing some to overlap the sun. Finally stamp the greeting to finish it off.
I think this is a lovely effect, which would look good in lots of different colours. I plan to try it again for a Christmas card. Thank you for visiting, I hope you like it. All the supplies used are linked below.
Debbie x