
Hi Everyone, it’s always nice to have a few Thank You cards on hand, especially just after Christmas. For this card, I used a new Thanks stamp and die set, which cuts the word Thanks
Hi Everyone, it’s always nice to have a few Thank You cards on hand, especially just after Christmas. For this card, I used a new Thanks stamp and die set, which cuts the word Thanks and has stamps which will add other phrases to the die cut word.

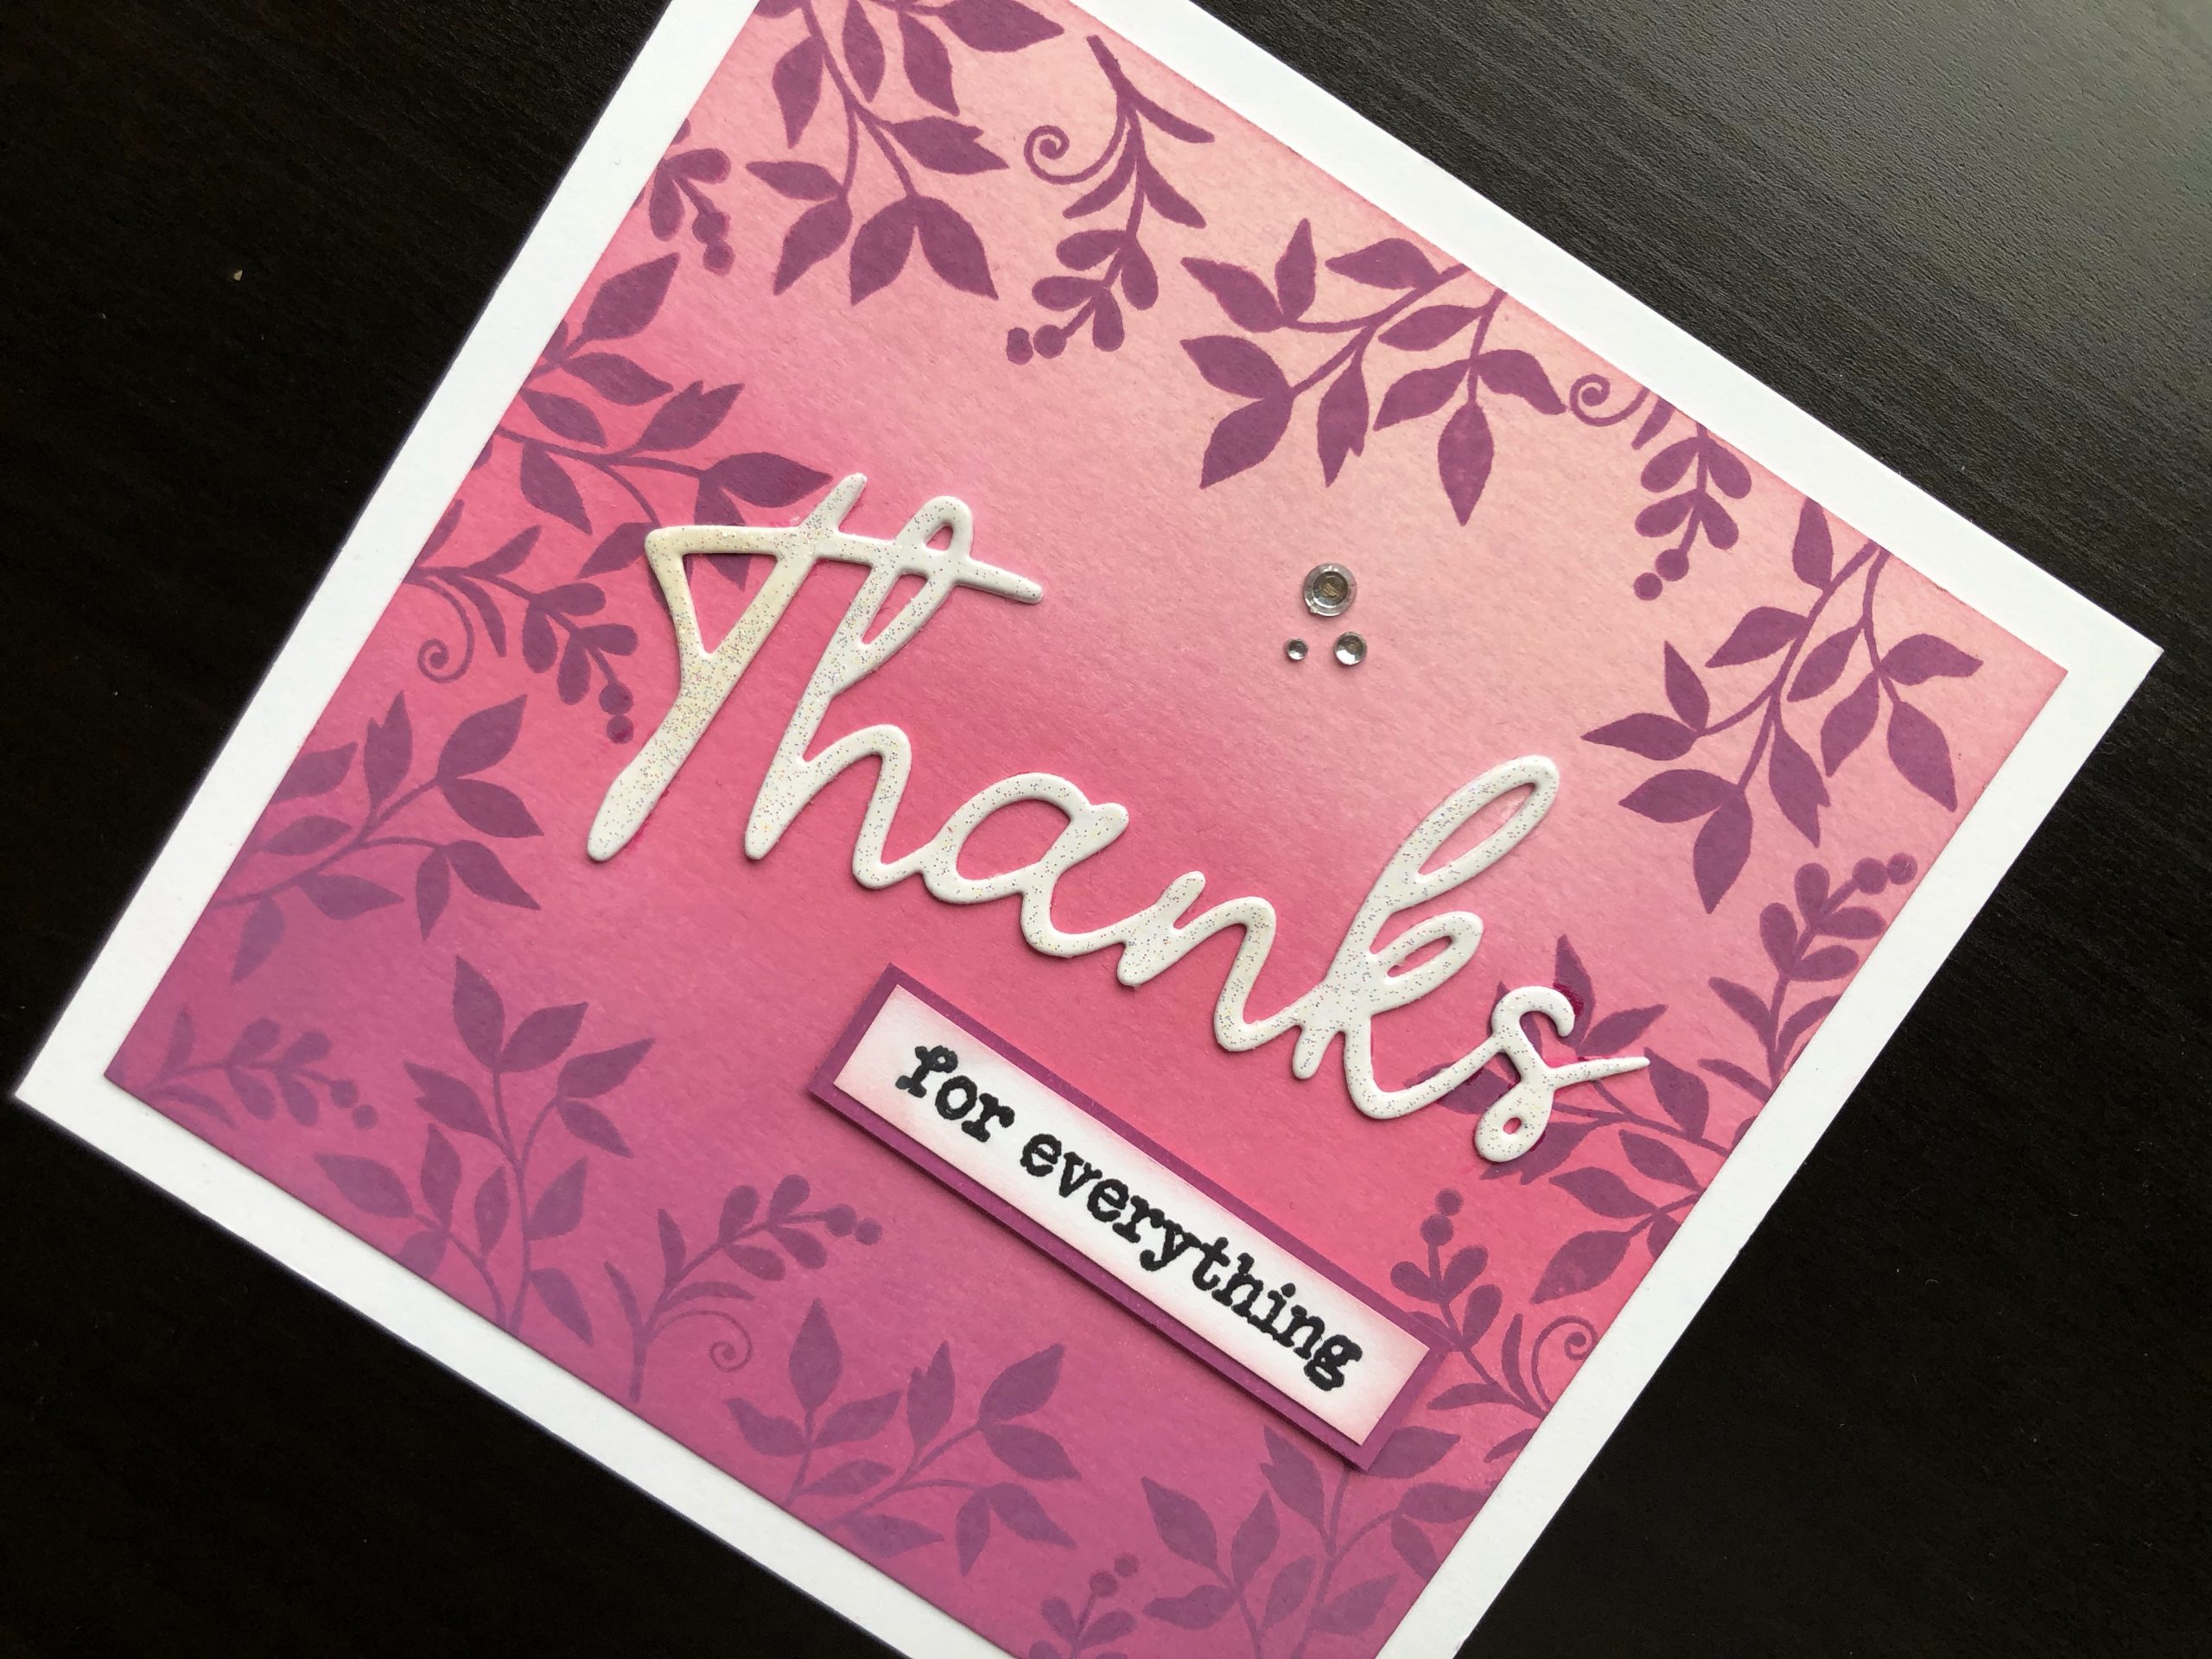
To Make the Card
Cut a piece of white card, 13.5cm square. Use three shades of ink blended vertically to create a pink ombre effect. Stamp around the edge with leafy stamps using the darkest of the background inks.
Die cut the word Thanks twice from white card. Glue them on top of one another to add extra dimension to the greeting. Cover the surface of the die cut word with embossing ink and heat emboss with clear crystal embossing powder to create a shiny, glittery effect. Adhere the inked, stamped panel to the front of a 6 inch, square, white card blank. Adhere the die cut word across the front of the card at a slight angle.
Cut a piece of card 6.5cm x 1.5cm ink it all over with the darkest of the inks used. Cut a second piece 6.2cm x 1.2cm ink around the edge in pale pink ink, then stamp the greeting in black ink. Use adhesive foam pads to attach the greeting to the card front below the die cut word. Add three adhesive crystals in a cluster above the die cut word.
I really like the way the glittery die cut word contrasts with the matt inked background. I hope you like it too, all the supplies used are linked below. Thank you for calling in.
Debbie x
Supplies used:
- White 6 inch square blank card and envelope
- A4 smooth white card
- Distress Oxide ink pads, Seedless Preserves, Picked Raspberry, Spun Sugar
- Dog Rose clear stamp set
- Thanks stamp and die set
- Foam ink blending tool
- Watermark ink pad
- Crystal clear embossing powder
- Sizzix heat gun
- Onyx Black ink pad
- 1mm adhesive foam pads
- Self adhesive clear crystals
- Dries clear glue