
Hi everyone, as soon as I saw this new Layered Poinsettia and Holly die set by Tim Holtz I knew it was going to look great for all sorts of Christmas card designs. For this
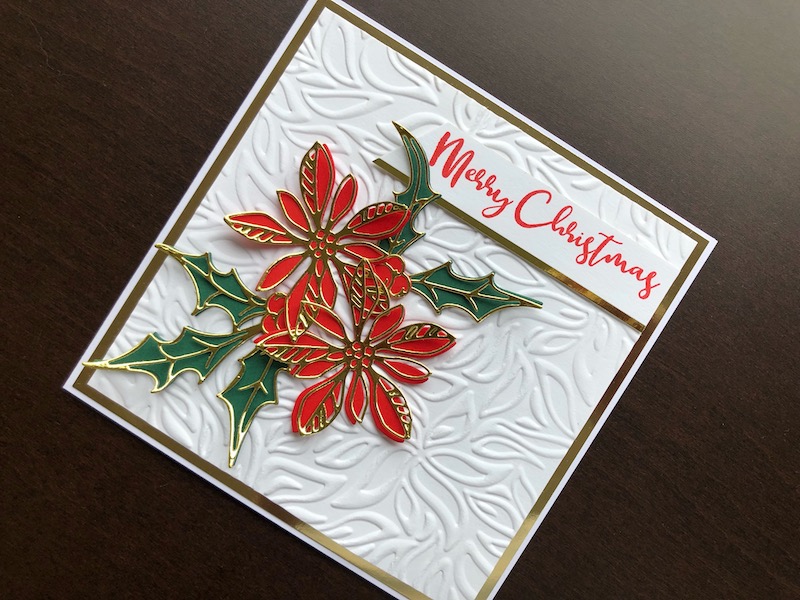
Hi everyone, as soon as I saw this new Layered Poinsettia and Holly die set by Tim Holtz I knew it was going to look great for all sorts of Christmas card designs. For this first use I chose classic red and green for the poinsettia and holly with gold on top, the effect is fabulous. The Floral Daydream embossing folder isn’t intended for Christmas but I thought the petals looked very similar to the poinsettia and made the perfect background.

To Make The Card
Start with a 6 x 6 inch blank white card and layer it with gold mirror card. Die cut two poinsettia flowers and two berry clusters from red card. Cut one of each of the holly sprigs in green card. Use gold mirror card to die cut an outline for each of the flowers, leaves and berries. Glue the gold outlines over the flowers etc. leaving the ends of the leaves and outer parts of the petals unglued so that they lift up and add dimension. Cut a 13.5cm square of white card and emboss with the Floral Daydream embossing folder. Adhere the embossed panel over the gold mirror card layer. Arrange the poinsettias, holly sprigs and berries in the bottom left hand area of the card and fix in place using double sided tape.
Stamp the sentiment in red on white card, glue this on to gold mirror card leaving a 2mm margin visible at the bottom. Cut the front end of the sentiment into a diagonal. Use double sided tape to adhere the sentiment to the top right hand area of the card.
Although this is an easy card to make the results are very eye catching, thanks to the wonderful poinsettia and holly die set. Thank you for visiting, all the products used are linked below.
Debbie x
Products used:
- White 6 x 6 inch blank card and envelope
- Gold mirror card
- A4 smooth white card
- Festive shades A4 card pack
- Poinsettia and Holly Seasonal Sketch die set
- Big Shot die cutting machine
- Floral Daydream embossing folder
- Merry and Bright clear stamp set
- Distress Oxide ink pad Candied Apple
- Press to Impress stamp positioning tool
- Double sided tape dispenser
- Woodware Crafty glue
- 6mm Ultra High Bond double sided tape