
Hi everyone, I recently attended an online workshop by Miranda Degenaars to learn her multi colour embossing technique. I can highly recommend the workshop, and this card is the result of the things I learned.
Hi everyone, I recently attended an online workshop by Miranda Degenaars to learn her multi colour embossing technique. I can highly recommend the workshop, and this card is the result of the things I learned. I can’t deny that it took a bit of time to make, although I am sure I would be quicker second time around. There are several different elements to the card, so I have split the description into sections. I am very pleased with the final result, and hope the intended recipient will like it too.

To Make The Card
How to Make the Multi Colour Embossed Backgrounds
Start with 2 pieces of white card, each approx 15cm square, swipe over each one with an anti static pad. Ink up your background stamp with Versamark ink, then lightly ink over it with a pale coloured pigment ink. (This enables you to see the stamped pattern so that you know where to put the different colours of embossing powder.) Select four colours of embossing powder plus silver metallic.
Take the first colour and carefully sprinkle the embossing powder onto areas of the pattern. For this technique a background stamp with a fairly dense pattern is best. I didn’t add the embossing powder randomly but followed the pattern adding the colour to certain areas. Tip the surplus embossing powder onto a sheet of paper and pour it back into the jar. Repeat the process with each of the four chosen colours. Finally sprinkle the silver embossing powder over the whole piece so that any areas that have been missed will be covered with silver. Tip off the surplus and return to the jar. Now use a heat gun to set all the embossing powder, make sure that you get all of it. Repeat the process for the second piece of card.
For the strip across the front of the card, take a piece of white card approx 15cm x 5cm and stamp in the same way as before. This time I used the Scratches background stamp, add the different colours of embossing powder in patches until the strip is covered. Remove the excess of each colour as before. I didn’t use the silver on this strip. Heat set the embossing powder. Rotate the background stamp and repeat the process so that more of the strip is covered with coloured embossing.
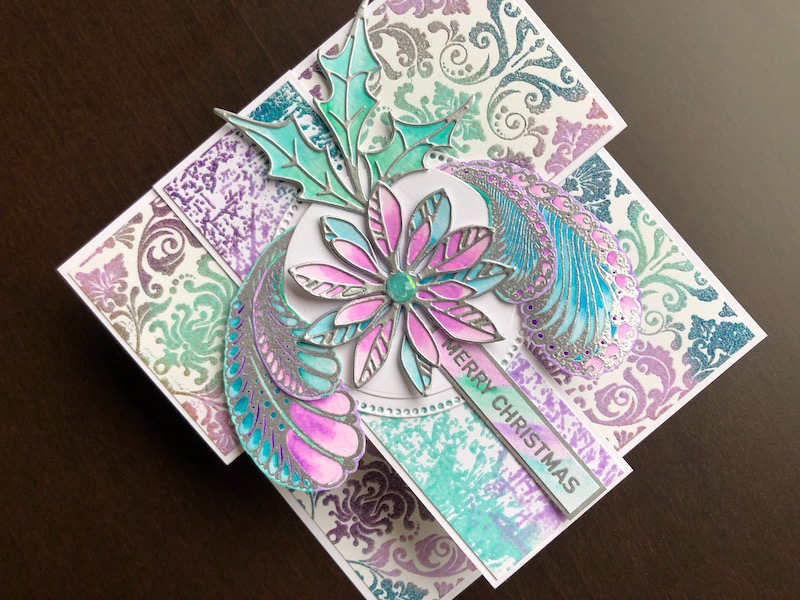
To Make The Decorations
Stamp the Paisleys onto watercolour card, and heat emboss with silver metallic embossing powder. Add colour with Watercolour marker pens and “spread” the colour using a water tank pen. Colour around the outside of the embossing, so that when you cut the shapes out you don’t get a white border. Die cut the poinsettia and holly leaves solid areas from watercolour card and colour in the same way as the paisleys. Die cut the border parts of the poinsettia and holly from matt silver card and adhere over the coloured petals and leaves. Make sure that the watercoloring has dried before you try to glue the borders on. Glue two poinsettias together and add a self adhesive crystal to the centre.
Stamp the sentiment onto watercolour card and heat emboss with silver. Watercolour over the stamping to create a multi coloured background and mount on silver card. Die cut two different sized circles from white card.
To Construct the Card

For the card base, cut white card to 29cm x 14.5cm, fold it in half to make a 14.5cm square card, then fold back the front in half to create the Z fold. Cut a strip of white card 29cm x 5cm and fold it in the same way as the card base. Trim one piece of embossed background to 14cm x 14cm and cut the other into three pieces one measuring 6.7cm x 14cm and two measuring 6.7cm x 4.5cm.
You now have all the elements of the card ready. Adhere the background panels to the inside and front of the card and the smaller panels to the strip of card. Attach the strip to the card, making sure that the card will open and close properly. Glue the two circles together but only in the centre, this leaves a space where the paisleys can be slotted in. Add glue to the small ends of the paisleys and tuck them between the two layers of circles, with the large ends overlapping the edge of the circles. Glue the poinsettia to the centre of the circle and the holly leaves just under it to the left side. Finally adhere the sentiment, on the centre strip slightly overlapping the edge of the circles.
Phew! There you have it, quite a lot of work but well worth it for such a special card. Thank you for calling in, I hope you like the card. All the supplies used are linked below.
Debbie x
Supplies Used:
- Coconut White A4 foundation card
- A4 watercolour card
- WOW embossing powders Primary Bluetiful, Oceanic, Eggplant, Parma Violet, Metallic Silver
- Versamark ink pad
- Sizzix heat tool
- Watercolour Marker Pen sets Rainbow Pastels, Berry Burst, Blue Lagoon
- Vault Seasonal Sketch Poinsettia and Holly die set
- Nested Circles with Small Circle Edges die set
- Nested Circles die set
- Paisleys cling rubber stamp set
- Christmas Sentiment Strips clear stamp set
- Cover a Card background stamp Damask
- Cover a Card background stamp Scratches
- Anti static pad
- Big Shot die cutting machine
- Water Tank brush pen
- Watercolour Florals adhesive crystals
- Dries clear glue
- Double sided tape dispenser