
Hi everyone, here’s the third of my quick and easy cards for Christmas. This one is made with a new die set from Creative Expressions, the Layered Snowflake Background die set. It doesn’t look very
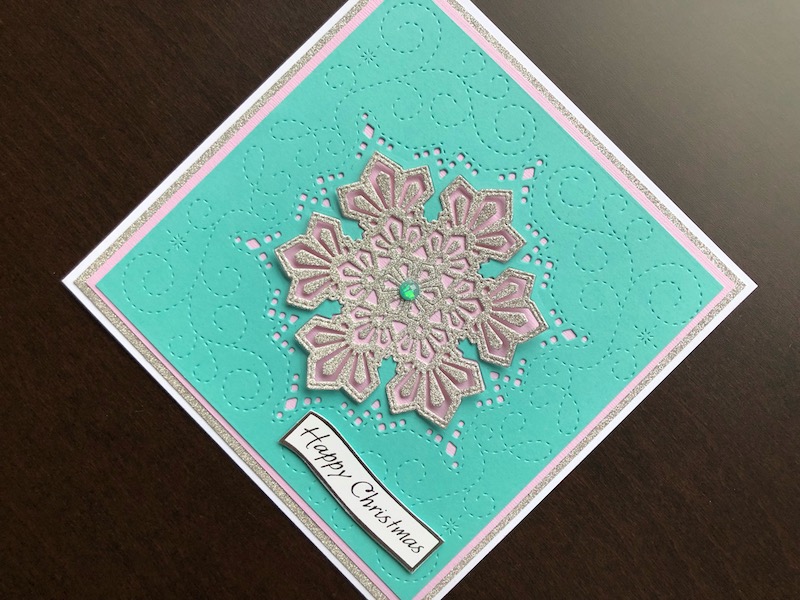
Hi everyone, here’s the third of my quick and easy cards for Christmas. This one is made with a new die set from Creative Expressions, the Layered Snowflake Background die set. It doesn’t look very inspiring in the package, but it creates a lovely effect and allows you to easily create different colour schemes. I have used a lot of mirror card this year so decided to go for glitter card this time. The smooth finish “no-shed” glitter card die cuts beautifully.

To Make The Card
Start with a white 6″ x 6″ blank card and trim it to 14.5cm square. Add a layer of silver glitter card and then a layer of pale pink card. Use both dies to cut the background with a snowflake aperture from turquoise card. Adhere this over the pink layer. Cut just the snowflake from silver glitter card and adhere into the aperture. Only glue the centre areas of the snowflake so that the outer edges lift slightly to add dimension.
Finish off with a self adhesive crystal in the centre of the snowflake. Pop a die cut sentiment out of the holder sheet, and sand away any notches. Use thin foam pads to adhere the sentiment to the bottom right corner of the card front.
MAKE IT FASTER: This is the ultimate quick card, there is no way to make it any faster!
NOT IN A HURRY: Create an inked layer in place of the pale pink card. Stamp and heat emboss a sentiment instead of the ready made one. Add more bling to the turquoise layer.
Thank you for visiting, I hope you like the card, you will find all the supplies used linked below.
Debbie x
Supplies Used:
- 6″ x 6″ white blank card and envelope
- Silver No-shed glitter card
- Pink, turquoise card
- Layered Snowflake Background die set
- Big Shot die cutting machine
- White and silver die cut Christmas sentiments
- Watercolour Florals self adhesive crystals
- Double sided tape dispenser
- Woodware Crafty glue
- 1mm adhesive foam pads