
Hi I wanted to do something extra special for this card, so decided to try a twisted easel fold card. Once I got my head round how it’s scored and folded, the rest was easy.
Hi I wanted to do something extra special for this card, so decided to try a twisted easel fold card. Once I got my head round how it’s scored and folded, the rest was easy. The bonus is that it folds flat to go in an envelope too.

To Make The Card
Start with a 12.5cm square, white blank card. Open it out and lay it face down, then score the front diagonally from the top right hand corner to the bottom left corner. Fold the front along the score line to create two triangles. This is the basis for a twisted easel fold card, all it needs now is decoration.
Cut two 12cm squares of dark pink card, adhere one to what would usually be the inside of the card, cut the other in half diagonally and adhere to each of the triangular sections. Cut a piece of patterned paper 11.5cm square and adhere to the inside of the card. Cut a piece of coloured paper 11.5cm square, then in half diagonally and adhere to the triangles.
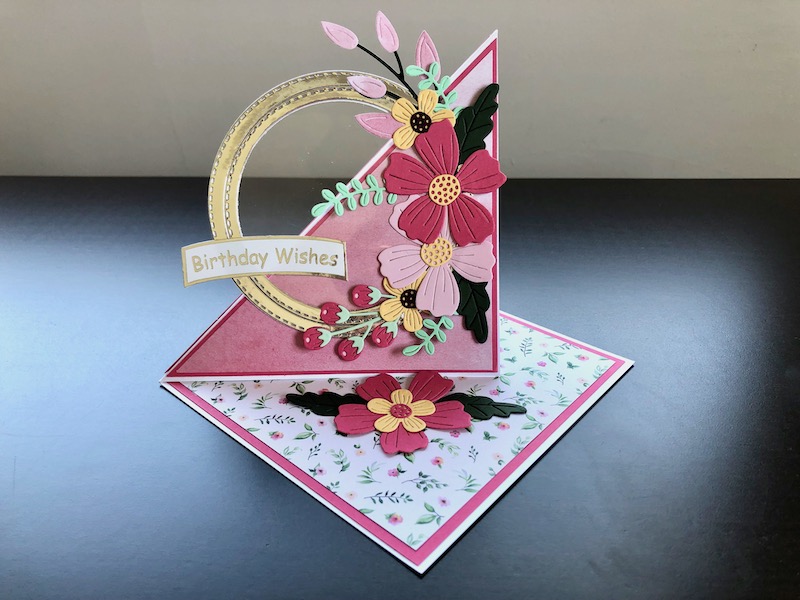
Cut four stitched circle frames from silver mirror card with the 9.5cm, 8.5cm and 7.5cm dies. Cut a circle of acetate with the 9.5cm die then trim it down with scissors to just inside the stitch line. Glue the stitched circles to the front and back of the acetate circle to give a neat finish on both sides. Position the circle on the card front so that the diagonal goes through the centre of it. Glue only the half that is on the bottom right hand triangle so the other half of the circle stands up when the card front is folded.
Die cut a selection of flowers, leaves and stems of buds and arrange these on the right hand side of the circle frame, overlapping onto the acetate. Pop the sentiment out of the carrier sheet, trim off any notches and adhere across the circle frame and to the acetate on the left side. Die cut another flower with leaves and adhere to the inside of the card to provide a prop to stand the card up.

This is how the inside of the card looks.

This is how the card looks when it is folded down ready to go in an envelope.
I am pleased with this card, the flowers and colours are very pretty and the fancy fold adds some extra interest. I hope you like it too, thank you for visiting, all the products used are linked below.
Debbie x
Products Used
- White 12.5cm square blank card and envelope
- Various colours of card stock
- Bloom and Wild 6″ x 6″ paper pad
- Easy Score scoring board
- Extendable paper trimmer
- Nested Stitched Circles die set
- Be Bold Blooms die set
- Big Shot die cutting machine
- Heat resistant acetate
- Die cut birthday sentiments silver
- Double sided tape dispenser
- Dries clear glue