
Hi, after the simplicity of the last card I made, I thought I would go the opposite way with this one, which has a bit of everything. I made it as a Thank You card
Hi, after the simplicity of the last card I made, I thought I would go the opposite way with this one, which has a bit of everything. I made it as a Thank You card but you could easily change it to a birthday or even Mother’s Day card.

To Make The Card
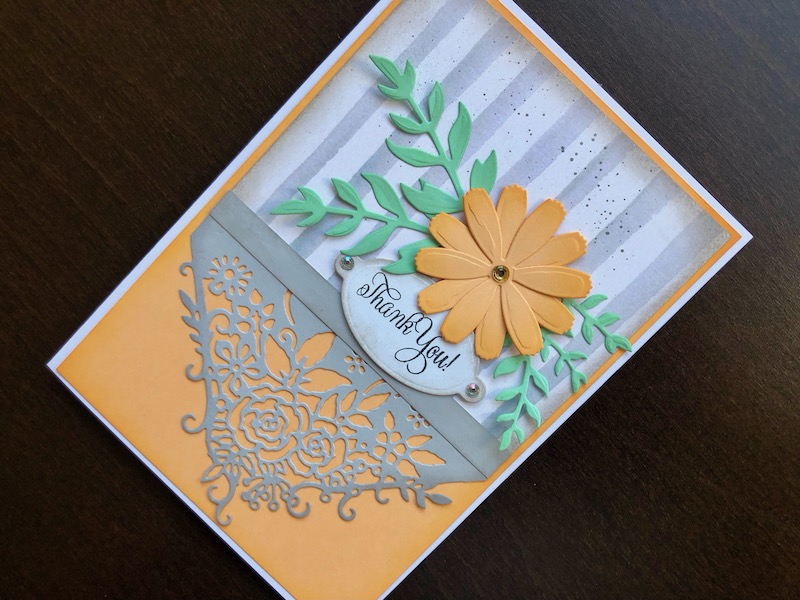
Start with a white 5″ x 7″ blank card and trim it down to 12.5cm x 17.5cm. Cut a piece of peach coloured card 12cm x 17cm, ink around the edges with orange ink and adhere to the card front. Cut a piece of grey watercolour striped paper to 11.5cm x 9.5cm. Ink around the edges with grey ink, then splatter with grey ink. Adhere this panel to the top part of the peach card. Die cut the Rose Corner from grey card, ink around the edges with grey and adhere below the striped paper to create a V shape rather than a corner. Cut a strip of grey card 11.5cm x 1cm, ink around the edges with grey and adhere over the join between the striped paper and the die cut Rose Corner.
Use white card to die cut an oval label, stamp the Thank You sentiment in black ink and ink around the edges in grey ink. Adhere the sentiment panel with thin adhesive foam pads, just above and slightly overlapping the grey strip. Use the peach card to die cut a large, solid cosmos flower twice, ink the ends of the petals with orange ink and glue them on top of one another with the petals offset. From light green card cut two large leaf stems, a small leaf stem and a two stem leafy branch. Ink the ends of the leaves with green ink. Adhere the flower with a thin adhesive foam pad, above and overlapping the sentiment panel, then glue the leaves either side of the flower with the stems tucked under it. Finish off with iridescent crystals on the tabs of the sentiment label and a gold crystal in the flower centre.
This card is part of a series of cards showing different ways to create flowers. I like the fact that this one has flowers both cut out of and into card. I hope you like it too, thank you for visiting. All the products used are linked below.
Debbie x
Products Used
- White 5″ x 7″ blank card and envelope
- Peach, grey and light green card
- Coconut White A4 card
- Watercolour Stripes 6″ x 6″ patterned paper pad
- Distress Oxide ink pads, Hickory Smoke, Balck Soot, Spiced Marmalade, Old Paper
- Foam ink blending tool
- Tags and Tickets die set
- Cosmos Flowers die set
- Corner Rose die set
- Big Shot die cutting machine
- Moments in Time clear stamp set
- Press to Impress stamp positioning tool
- Gold and Silver self adhesive crystals
- Double sided tape dispenser
- 1mm adhesive foam pads
- Dries clear glue