
Hi everyone, I thought I would give you two cards for the price of one today! I have made the same basic card but in two different styles and colour schemes. It also gave me
Hi everyone, I thought I would give you two cards for the price of one today! I have made the same basic card but in two different styles and colour schemes. It also gave me a chance to use this lovely Woodware Hand Drawn Greetings stamp set. Having used patterned paper on both of the cards it was only a small step to use the same paper to make matching envelopes for them too.

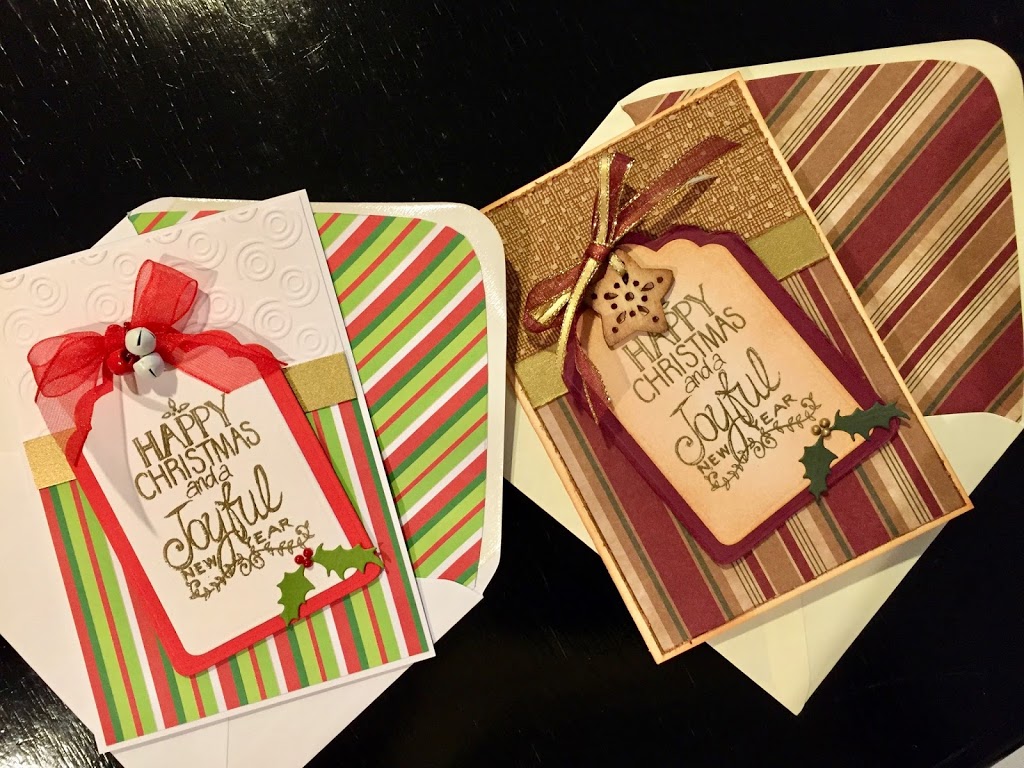
Here’s a closer look at each of the cards.


You can see that each element appears on both cards with the first one being darker and distressed whilst the second is in more traditional colours, could be his and hers cards!
Here’s how to make either card, listed below are the specific products used.
Start with an A6 card blank, cut a piece of patterned paper to 10 x 9.5cm and attach to the bottom portion of the card blank with double sided tape.
Cut a piece of card 10 x 4.75cm and dry emboss, for the darker card use Colorcore paper and sand it after embossing to reveal the core colour. Use double sided tape to adhere this to the top portion of the card. Cut a piece of gold card 10 x 1.5cm and adhere over the join between the patterned and embossed papers.
NOTE: for the darker card the edges of the patterned paper, embossed card and gold strip have all been distressed with a paper scruffer and inked.
Die cut a tag shape from white card, stamp the Christmas message with Watermark ink and heat emboss with gold embossing powder, die cut the next size up tag shape from coloured card, then recut to take about 4mm off the length ( run it through the machine again with the die positioned about 4mm in from the bottom of the tag with everything else lined up, this will trim 4mm off the bottom of the tag).
NOTE: for the darker card the white tag is inked with distress ink and the bigger tag has it’s edges distressed with a paper scruffer.
Use different ribbons etc. to create a bow and attach the jingle bells/wooden star to the top of the tag, (the wooden star has been inked around the edges).
Die cut two holly leaves and use a Quickie Glue Pen to adhere them to the bottom corner of the tag, use 3mm adhesive pearls for the holly berries, red for the bright card and natural coloured with a gold Sharpie for the darker card.
Attach the whole tag to the card using 3mm adhesive foam pads.
Finally take your envelope, open the flap and draw round it onto your patterned paper, cut it out and trim 3 – 4mm off all round to make sure it will slide into the envelope easily and not obscure the bit that you lick to seal the envelope. Insert it into the envelope and fold down the flap to crease the patterned paper, depending on the thickness of your paper you might need to smooth it down with a bone folder.
And there you have it two cards for the price of one! I really enjoyed making these cards, but can’t decide which one I like best, I hope you like them too, please leave a comment to let me know which one you like best.
Debbie x
Materials used Bright Card:
- White A6 card blank and envelope
- Festive Shades A4 card pack
- Swirls embossing folder
- Christmas Stripe Paper (free to download)
- Watermark ink pad
- Hand Drawn Greetings stamp set
- Gold embossing powder
- Nested Tags die cutting set
- Winter Foliage die cutting set
- 3mm red adhesive pearls
- Red Super Sheer ribbon
- Red Beaded String
- Red and White Jingle Bells
- Cream A6 card blank and envelope
- Jingle All The Way 12 x 12 paper pad (Discontinued)
- White, burgundy, green and gold card
- Colore Core Cardstock Vintage Collection 6 x 6 paper pad
- Tea Dye Distress ink pad
- Sanding block
- Paper scruffer
- Swiss Dots embossing folder
- Foam ink blending tool
- Watermark ink pad
- Gold embossing powder
- 3mm Natural adhesive pearls
- Gold Sharpie pen
- Winter Foliage die cutting set
- Nested Tags die cutting set
- Hand Drawn Greetings stamp set
- Wooden Christmas shapes
- 3mm gold ribbon
- Gold Edged Burgundy ribbon