
Hi here’s a clean and simple thank you card, with a vibrant Pixie Powder panel and a single die cut feather. Perfect for recipients of any age and always handy to have on hand for
Hi here’s a clean and simple thank you card, with a vibrant Pixie Powder panel and a single die cut feather. Perfect for recipients of any age and always handy to have on hand for when the need arises.
My inspiration for the card came from the blog of a lady called Sue which I happened to come across.

To Make the Coloured Panel
Start with a piece of white card, no smaller than 7cm x 8.5cm. Mist the card with water just to dampen the surface, so that the Pixie Powder sticks to it. Sprinkle different co-ordinating colours of Pixie Powder over the card surface, you don’t need to cover it completely. Now spritz the Pixie Powder with water to make the colours come to life. Heat set with a heat gun, then repeat this process until you are happy with the results and the card is completely covered . Dab away any excess water with a paper towel during this process.
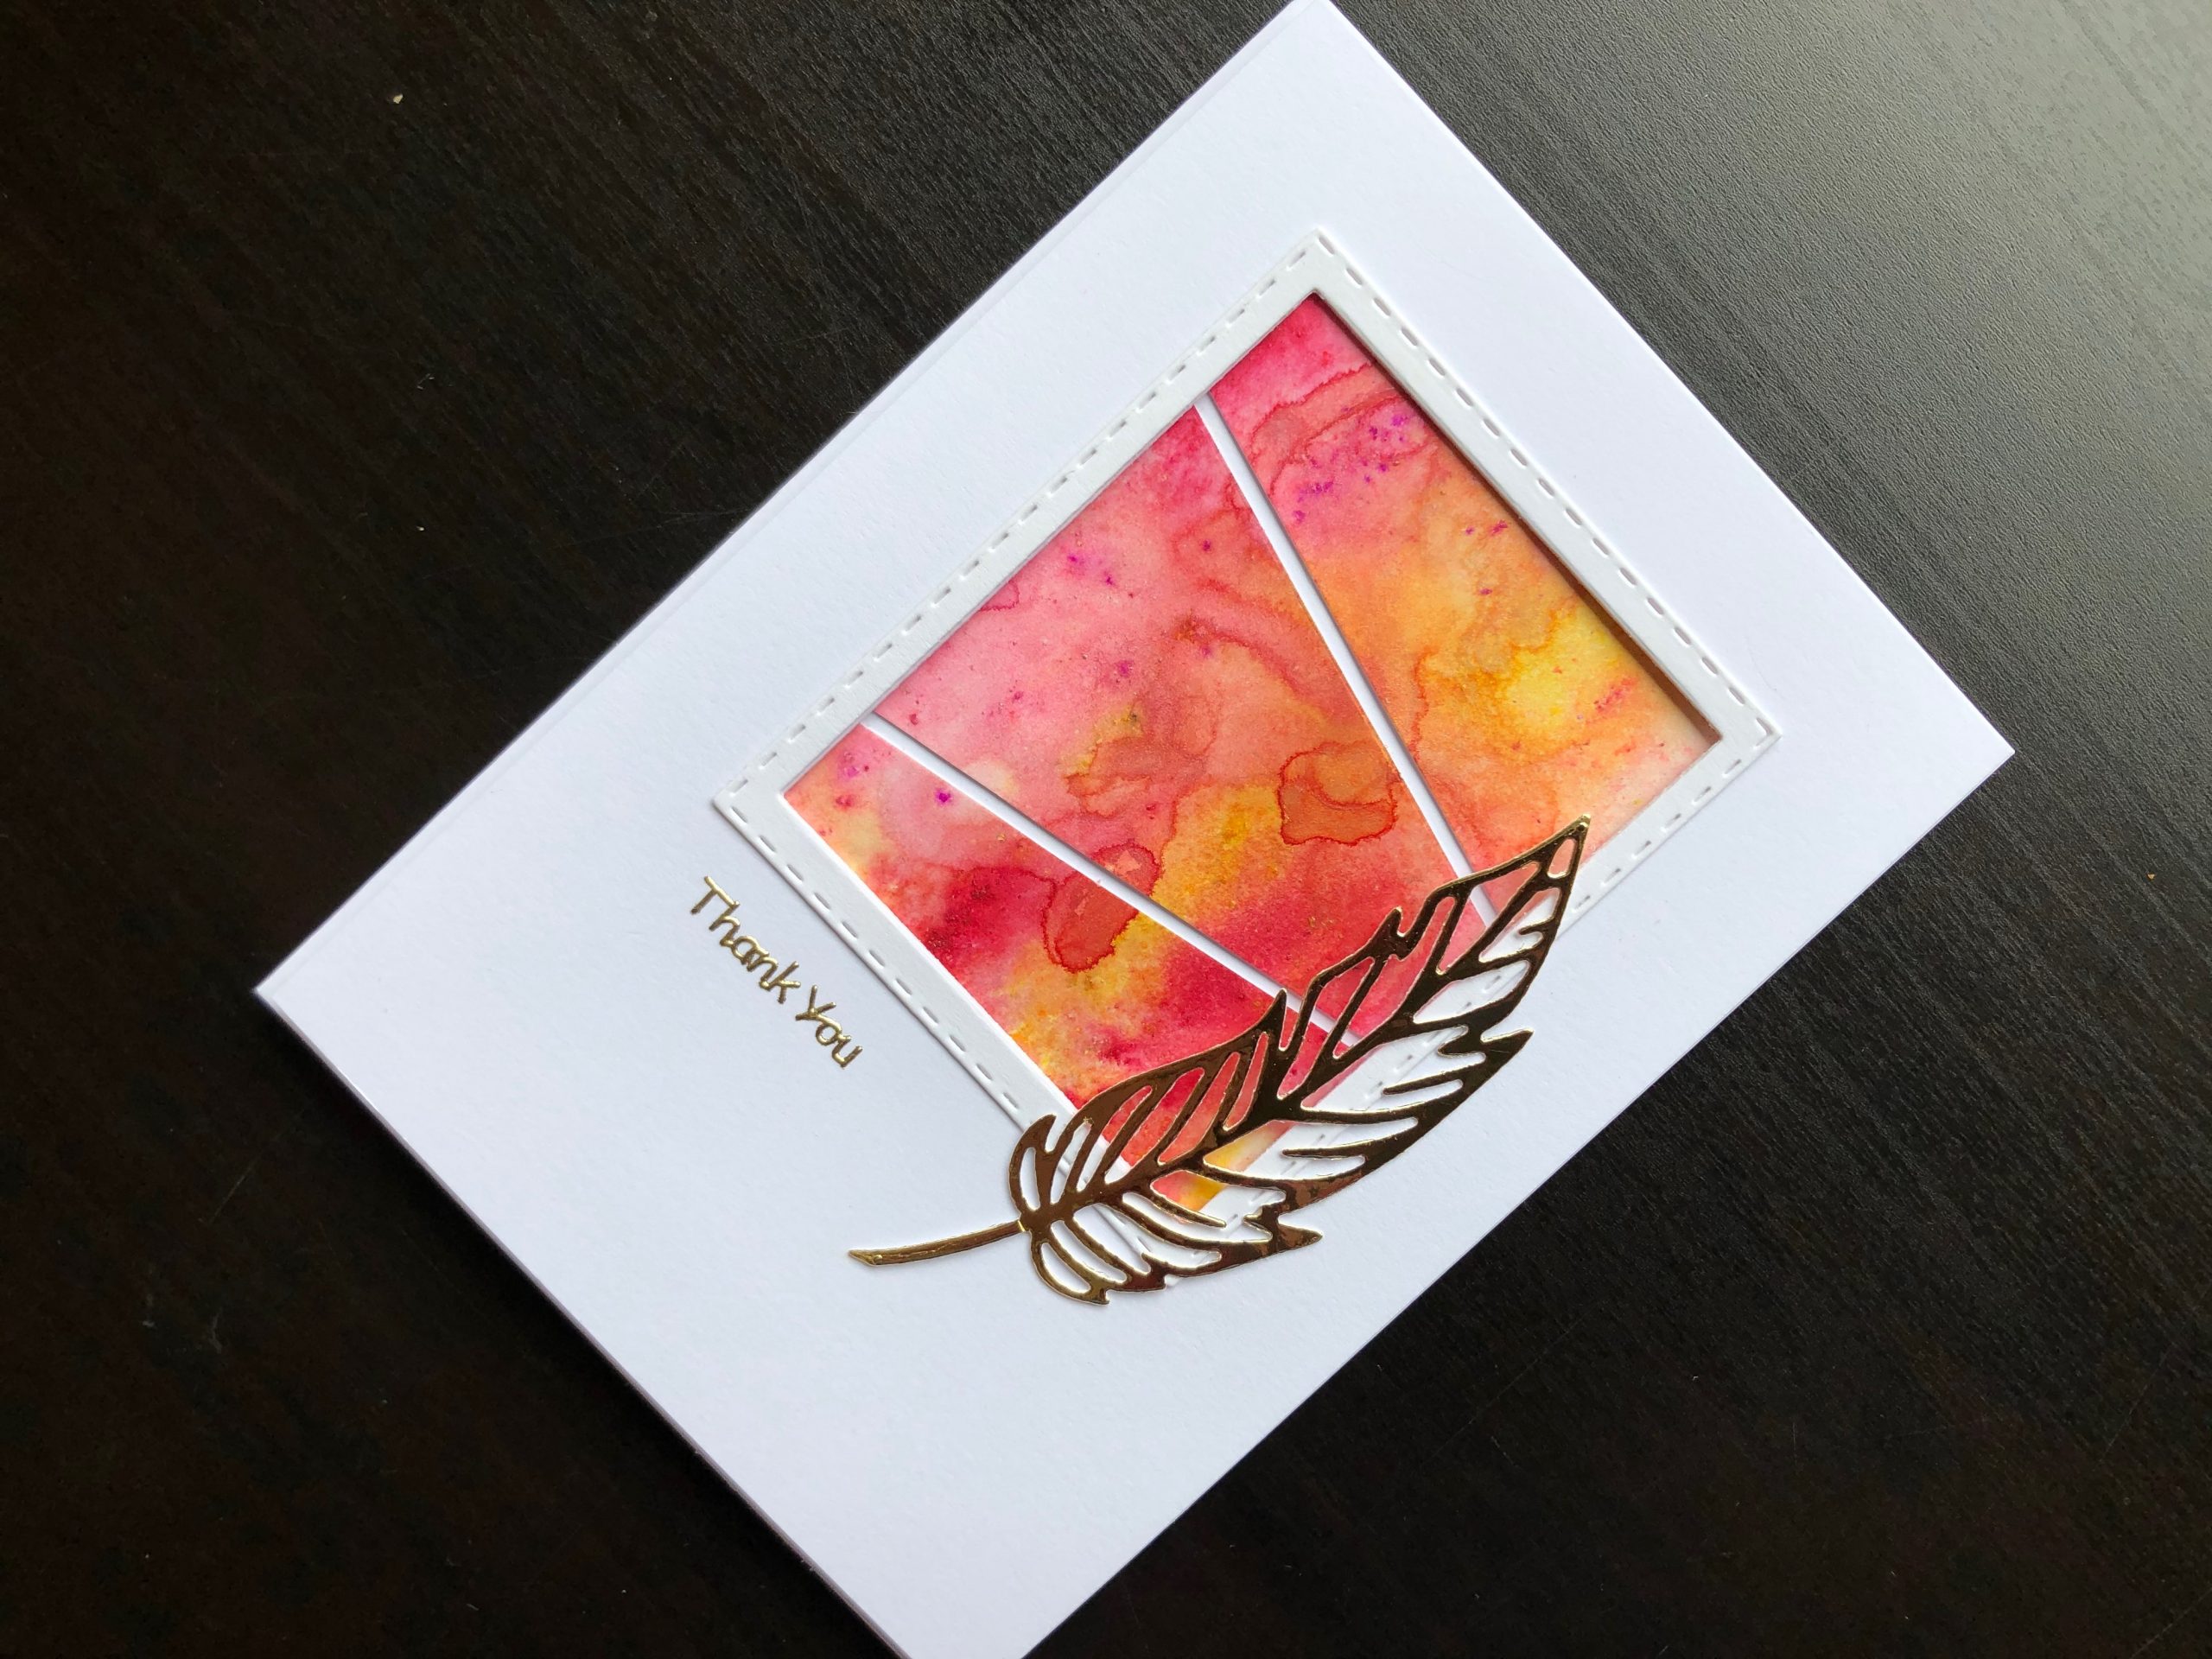
Here is a close up of the Pixie Powder area so that hopefully you can see the lovely sheen that it produces along with the colour.

To Make the Card
Take a white A6 blank card and cut a piece of white card to 10.25cm x 14.5cm. Cut a rectangular aperture in the white card 6cm x 7.4cm (I used one of the Stitched Rectangle dies to do this). Place the white card over the card blank and mark the aperture with a soft pencil to show where the Pixie Powder panel should go. Cut the Pixie Powder panel diagonally into three parts and adhere to the card blank in the marked area, leaving a small space between each piece.
Adhere the white card with the aperture to the card front so that the Pixie Powder panel shows through. Use foam tape to adhere it so that it lifts it above the panel and adds depth. Die cut a white stitched rectangle and adhere this over the edge of the aperture.
Die cut a feather from gold mirror card and adhere across the bottom right hand corner of the stitched frame. Finish off with a gold Thank You peel off just below the frame.
I am very happy with the way this turned out, the neutral design could be used for lots of other occasions such as birthdays etc. Try changing the colour scheme to suit the recipient. Use die cut flowers, leafy stems or flourishes in place of the feather to switch up the design. Thanks for visiting, come back soon.
Debbie x