
Hi everyone, this is the fifth and last card in my snowfall effects mini series, so I thought I would end with a double dose of snowfall. The white card front has a dry embossed
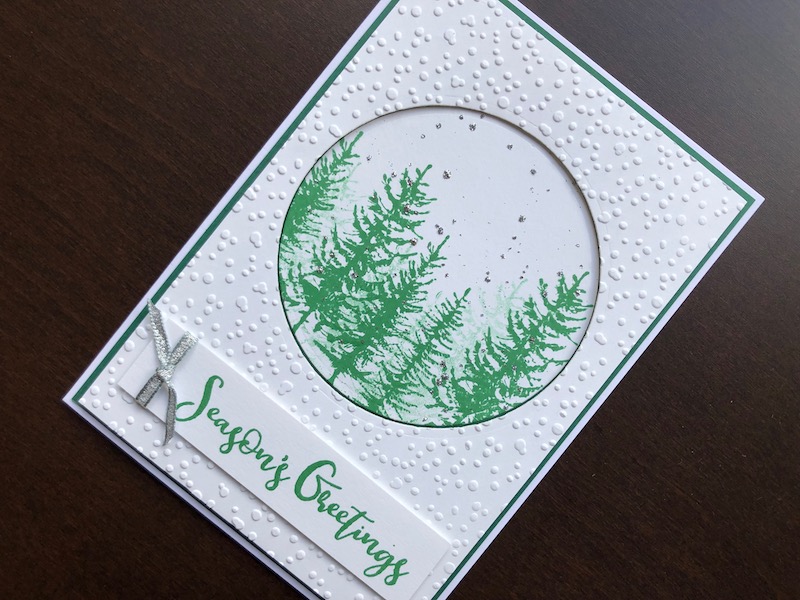
Hi everyone, this is the fifth and last card in my snowfall effects mini series, so I thought I would end with a double dose of snowfall. The white card front has a dry embossed snowfall effect and the inset of stamped pine trees has glitter snowfall. As the colour scheme and card design are fairly simple I don’t think a double dose of snowfall is too much.

To Make The Card
Start with a 5″ x 7″ white blank card and layer it with dark green card. Cut a piece of white card 11.8cm x 17cm , die cut a circle from it towards the top. Run the white card with the circle aperture through a die cutting machine with the Snowfall embossing folder. It is important to die cut before you emboss, to stop it from being flattened. Take the die cut circle and stamp the pine trees in dark green. I cut up the Pine Trees stamp so that each tree is separate, and I could choose how to position them. I double stamped each tree before re-inking to create some fainter trees that look like they are in the distance.
To create the glitter snow effect, put a small amount of PVA type glue on to a waterproof surface such as a plastic plate or acrylic block. Add some water and mix into the glue using a water tank pen, the mixture needs to be quite thin. Pick up some of the diluted glue on the water tank pen and flick it onto the stamped circle. Be careful, when I did this I ended up with glue all over my laptop! Sprinkle superfine glitter over the circle and shake off the excess. If necessary, repeat the process until you are happy with the quantity of glitter snow on your trees. Set aside to dry.

Adhere the embossed frame to the card front using 2mm foam tape. Stamp the greeting in the same dark green ink onto a strip of white card. Tie a piece of narrow silver ribbon around one end. Adhere this below the circle aperture using 1mm foam pads. When the glitter snow is dry, glue the back of the circle and stick it in place inside the aperture.
That’s it finished. I have really enjoyed experimenting with the different ways of creating falling snow effects, I hope you have enjoyed it too. Thank you for calling in, all the supplies used are linked below.
Supplies used:
- White 5″ x 7″ blank card and envelope
- A4 Coconut White foundation card
- Dark green card
- Christmas Pine Trees clear stamp set
- Merry and Bright clear stamp set
- Memento Dew Drop ink pad Cottage Ivy
- Falling Snow embossing folder
- Woodware Crafty glue
- Water Tank Brush pen
- Ultra Fine Glitter silver
- 2mm adhesive foam tape
- 1mm adhesive foam squares
- Double sided tape dispenser
- 3mm metallic silver ribbon