
Hi, what could be more of a classic combination for Mothers Day than flowers and lace. I have made a few cards recently with smaller more two dimensional flowers, but I wanted something bolder for
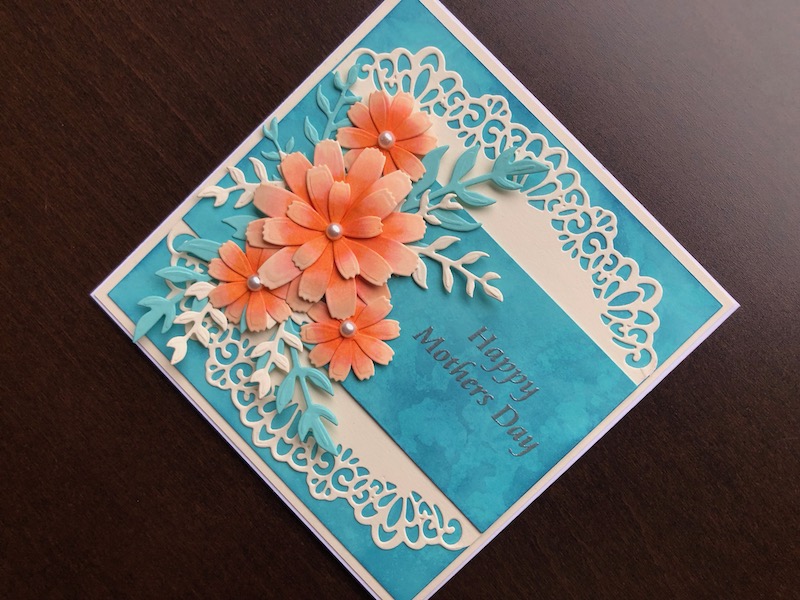
Hi, what could be more of a classic combination for Mothers Day than flowers and lace. I have made a few cards recently with smaller more two dimensional flowers, but I wanted something bolder for this one, these Cosmos Daisies worked perfectly.

To Make the Card
Cut a piece of light turquoise card 12.5cm x 12.5cm, ink all over with dark turquoise but don’t worry about getting full coverage. You want a quite uneven finish. Lay the card on a water resistant surface and tape the stencil in place over it. Just tape one edge of the stencil to create a hinge. Spritz all over the stencil with water, then lift up the stencil and blot away the water with kitchen roll. Repeat the process until you can see some of the stencil design, it will be quite indistinct but this is the sort of marbled finish that I wanted. Repeat the whole process to make a second panel measuring 12.5cm x 6cm.
Trim a 6″ x 6″ blank card to 13.5 cm square, cut a layer of cream card 13cm square and adhere to the card front. Adhere the square inked panel on top of the cream layer. Take a piece of cream coloured card 12.5cm x 12cm, cut a lace edge in to the top and bottom, then cut the piece in two across the centre. Position the lace pieces so that the top and bottom edges of the lace are at the top and bottom of the inked panel. Glue them in place. It doesn’t matter if there is a gap in between as this will be covered by the second inked panel. Stamp the Mothers Day sentiment at the right hand end of the inked panel and heat emboss with silver embossing powder, glue this panel across the centre of the card.
Die cut two of the largest flowers, one of the medium size and seven of the smallest, all from cream card. Use marker pens or pencils to colour the petals, creating an ombre effect from the centre. For the main flower, glue the two large flowers on top of each other with the petals offset, followed by the medium and a small one. Use the other six small flowers to make three, two layer flowers. Add an adhesive pearl to the centre of each. Cut a selection of leaf stems from light turquoise and cream card. Arrange the flowers and leaves at the left hand end of the inked panel, use adhesive foam pads to adhere the flowers, and glue on the ends of the leaf stems that are tucked under the flowers.
That’s the card finished. I love this colour combination, which would work equally well as a birthday card. I hope you like it too, thank you for visiting. If you have a moment please scroll down and leave a comment to let me know what you think. All the products used are linked below.
Debbie x
Products Used
- White 6″ x 6″ blank card and envelope
- A4 Ivory card
- Pale turquoise card
- Extendable paper trimmer
- Uncharted Mariner Distress Oxide ink pad
- Foam ink blending tool
- Trellis Vines stencil
- Stencil tape
- Caelum Border die set
- Cosmos Flowers die set
- Big Shot die cutting machine
- Spectrum Noir Classique alcohol markers Oranges
- 5mm self adhesive natural pearls
- Mothers Day Wishes clear stamp set
- Versamark ink pad
- Stamp positioning tool
- Metallic Silver embossing powder
- Heat gun
- Dries clear glue
- 1mm adhesive foam pads