
Hi Everyone, last time I used this layered poinsettia stamp was to make a winter birthday card in pink and green. This time I wanted to make a Christmas card and chose much more traditional
Hi Everyone, last time I used this layered poinsettia stamp was to make a winter birthday card in pink and green. This time I wanted to make a Christmas card and chose much more traditional colours. The background is dry embossed, Color Core card to add some subtle interest and texture.

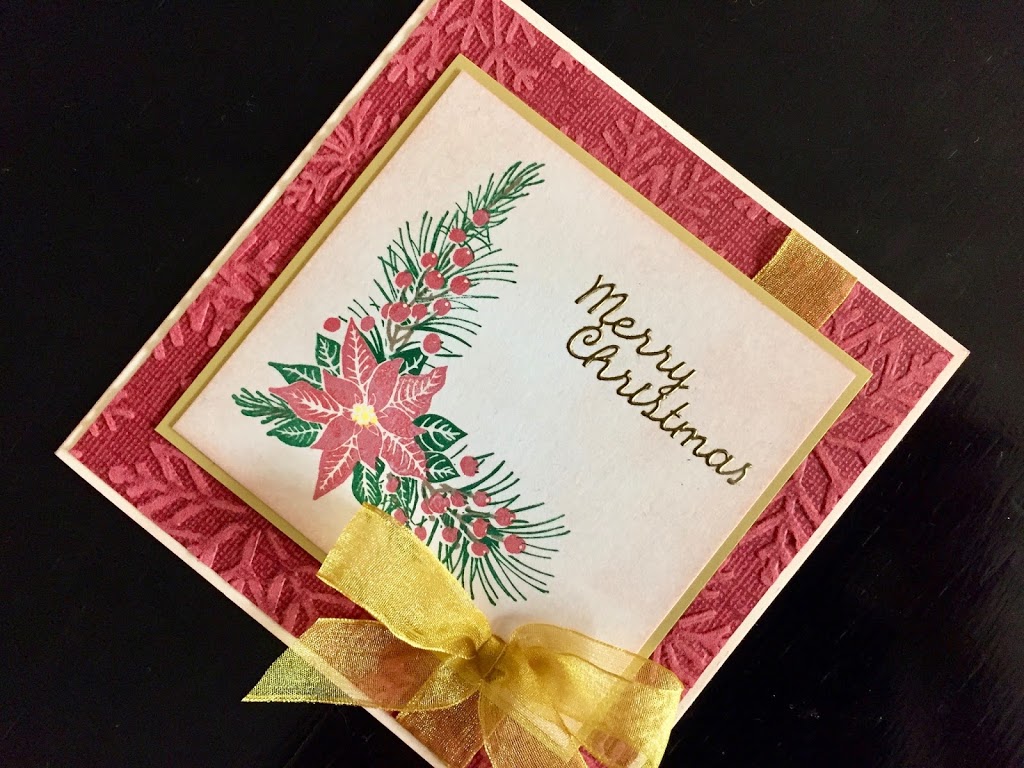
Start with a 12.5cm square cream blank card and ink the edges with Tattered Rose distress ink. Trim a piece of red Color Core card stock to 12cm square, dry emboss a snowflake design and lightly sand to let the ‘core’ colour show through. Cut a 14cm length of gold ribbon, position it vertically over the right side of the card stock and tape the ends on the back to hold it in place. Use double sided tape to adhere the embossed card and ribbon to the blank card.
Cut a piece of white card 9.5 x 9cm, ink up the first of the three stamps with the poinsettia flower and berries on with red ink and stamp in the bottom left corner of the piece of card. The second stamp is the leaves, ink this with green ink and stamp over the flowers. The stamps are square with one cut off corner so that when you stamp the first one you can mark the position of the stamp with a pencil to make sure you get the others positioned correctly. For the third layer, ink the branches with brown and the flower centre with yellow and stamp this over the first two layers, to complete the image. When the stamping is completely dry ink over the card and stamping with Tattered Rose distress ink, letting it fade out towards the centre of the card.
Cut a piece of gold card 10 x 9.5cm and layer the stamped card onto it. Use double sided tape to adhere this to the background over the strip of ribbon.
Cut another length of gold ribbon, tie it into a bow and glue it to the bottom right corner of the stamped card just above the strip of ribbon. Use a gold Sharpie to colour a gold peel off, (it makes the gold a bit duller), when it is dry stick it in position in the top right hand corner of the stamped card. I found the layered stamp was easy to use and looks great in these colours, making a lovely classic Christmas card. Thanks for reading, hope you like the card, it would be great if you could leave a comment to let me know what you think.
Debbie x
Materials used:
- Cream 12.5cm square blank card and envelope
- Core’dinations 6 x 6 ColorCore card stock Vintage Collection
- Crafters Companion 3D Snowflake embossing folder
- Sanding block
- Double sided tape runner
- Gold Super Sheer ribbon
- A4 smooth white card
- Festive Shades A4 card pack (for the gold card)
- Layered Poinsettia Corner stamp set
- Tattered Rose distress ink pad
- Foam ink blending tool
- Evergreen, Canary, Cocoa and Scarlet pigment ink pads
- Christmas Words and Pictures peel off gold
- Gold Sharpie