
Hi Everyone, here’s another card by our guest designer Garcia demonstrating more techniques with the wonderful Neon Polishes. I hope you agree that the results are once again, fabulous. To Make the Card Start with
Hi Everyone, here’s another card by our guest designer Garcia demonstrating more techniques with the wonderful Neon Polishes. I hope you agree that the results are once again, fabulous.

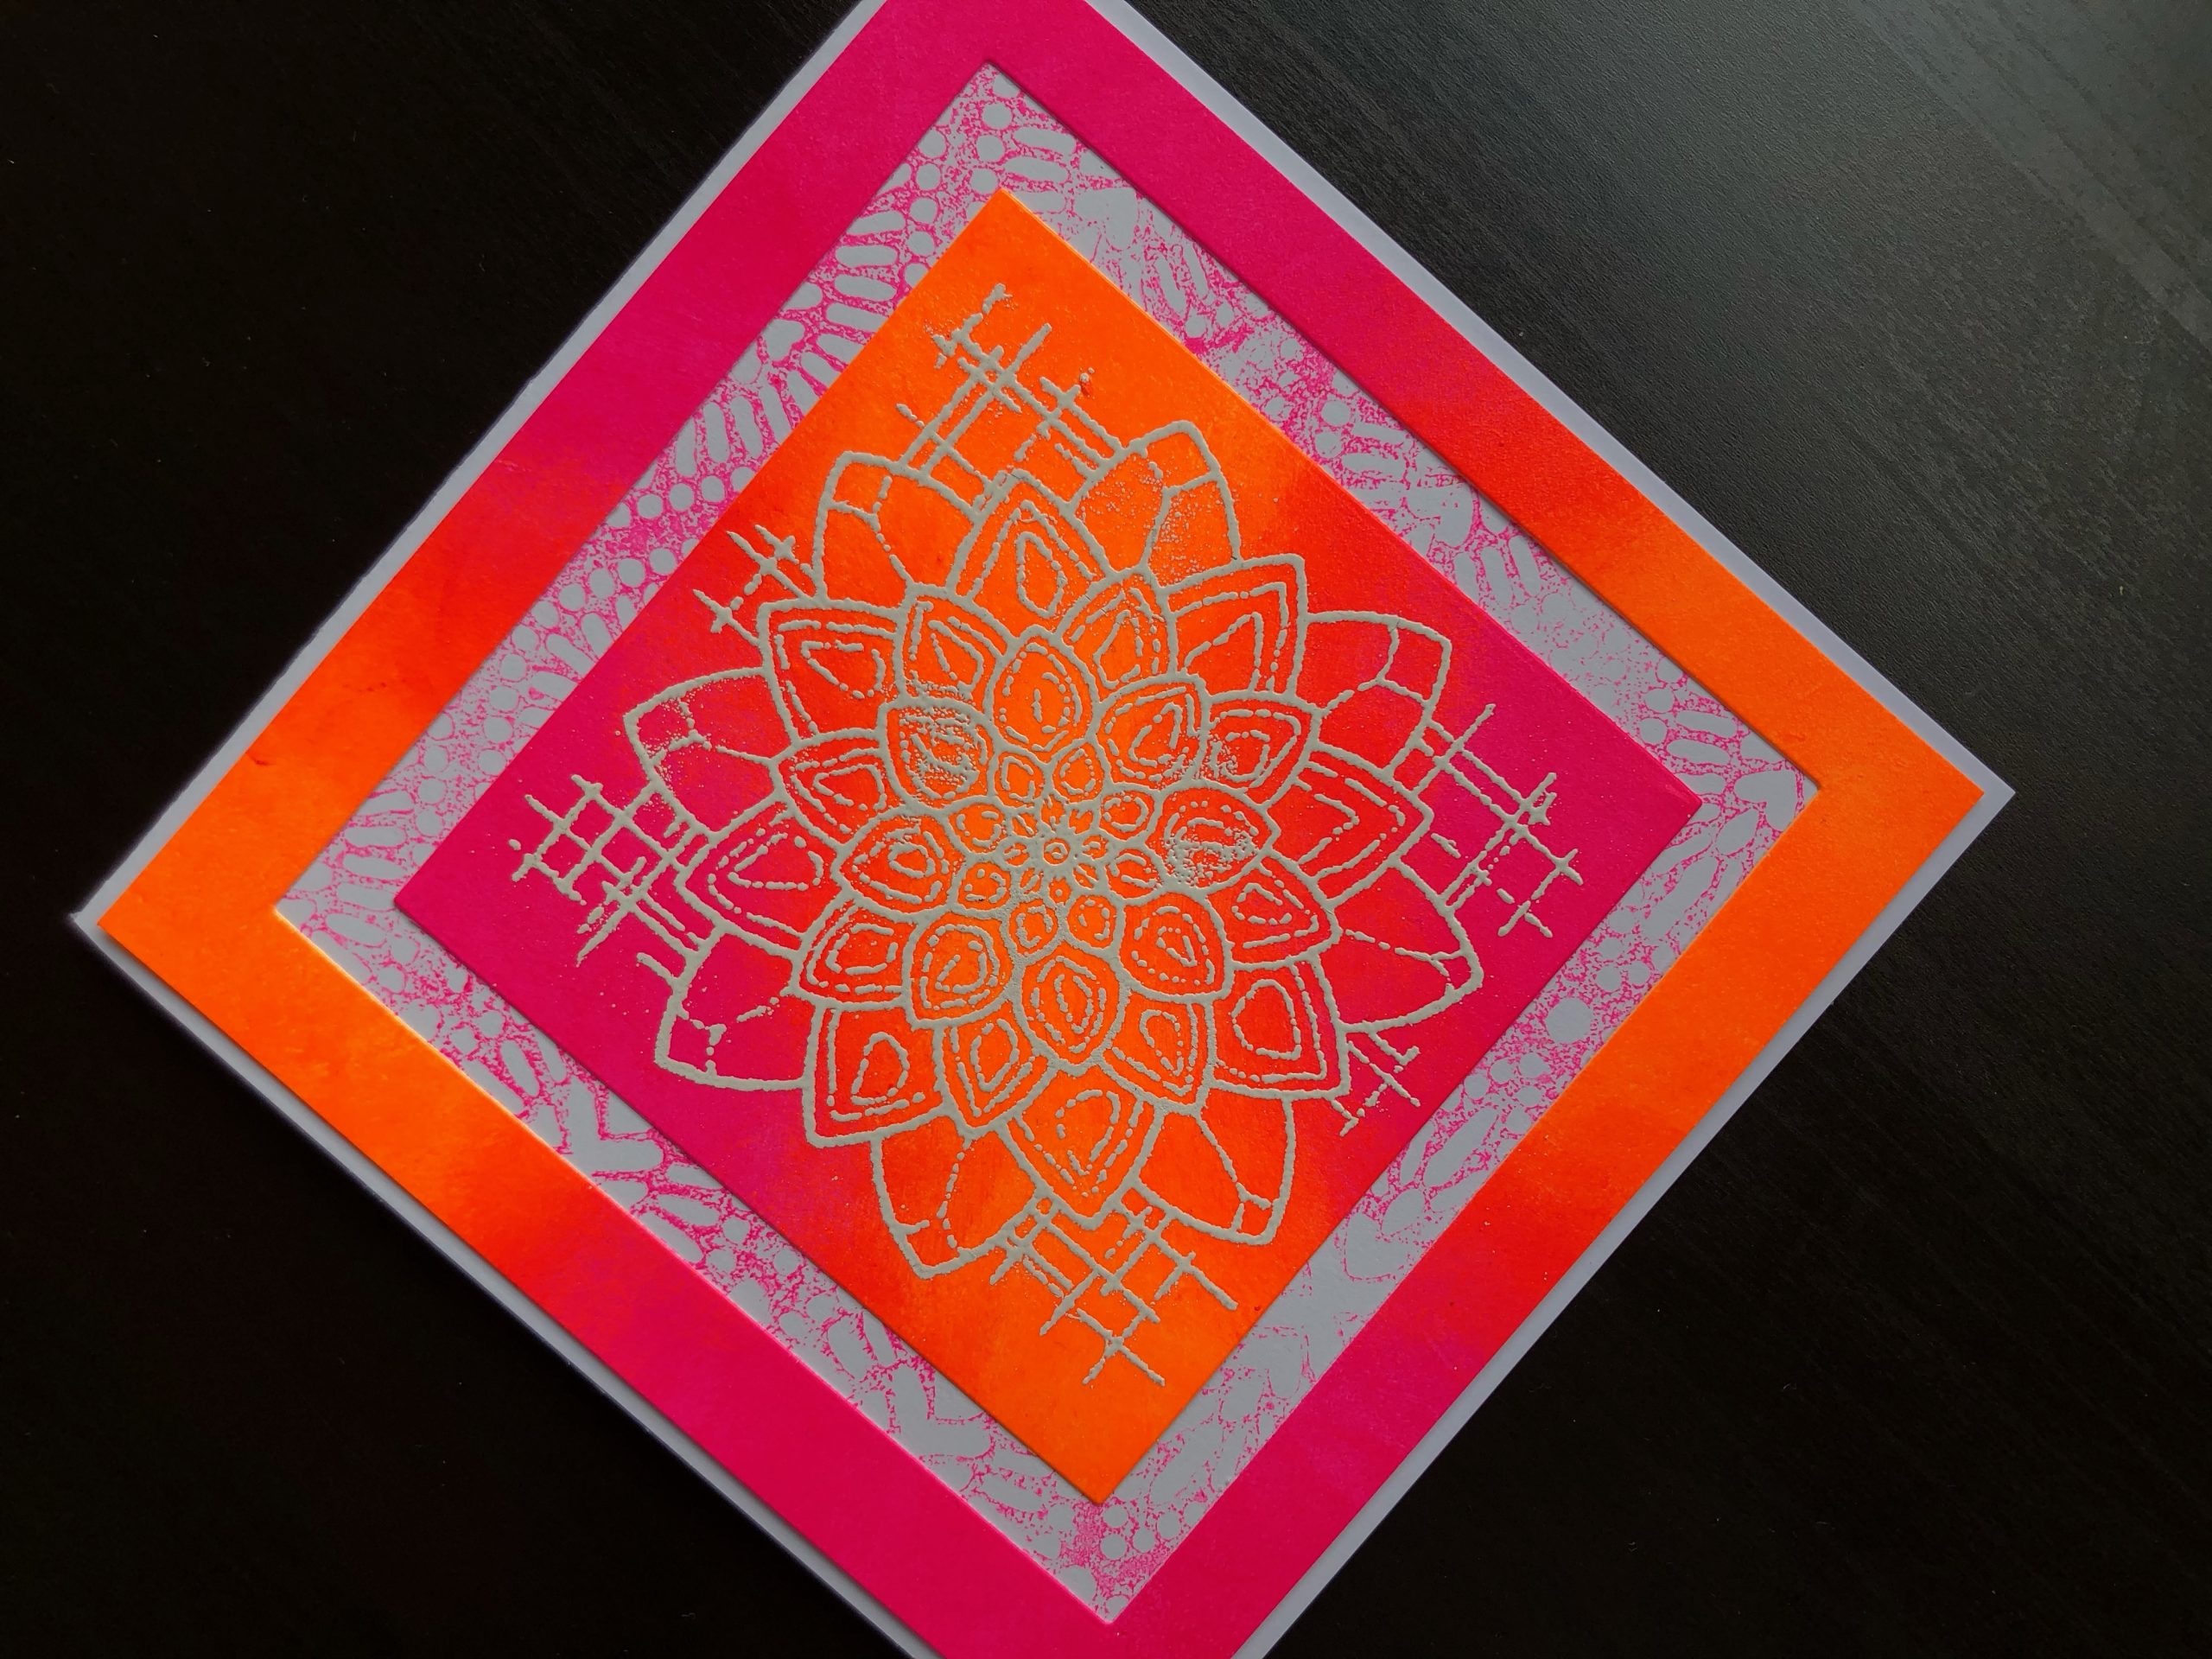
To Make the Card
Start with a 6 x 6 inch white blank card. Cut two pieces of white card 14cm square. Apply pink neon polish to the surface of the stencil itself, spritz lightly with water and invert it onto one of the pieces of card. Press down well with a piece of kitchen roll. This is a sort of reverse stencilling technique, that produces a design from the negative of the stencil, set it aside to dry. Once dry adhere to the card blank.
Spritz the second piece of card lightly with water then blend pink and orange polish all over it. Allow to dry then repeat the polish application until you are satisfied with the depth of colour. Make sure it dries completely between each application. Swipe over the coloured square with an anti static pad, then stamp the Blossom stamp with embossing ink. Sprinkle with white embossing powder, tap off the excess and heat set.
Use a square die 9.9cm to cut out the stamped Blossom. Then use a bigger square die 11.7cm to cut away more of the coloured card leaving a 14.2cm frame that is 1.3cm wide. Adhere the blossom panel to the centre of the card and the frame around the edge over the stencilled piece.
This card has no sentiment on the front so as to show as much as possible of the various designs. You could use this card for all sorts of occasions and easily add a small sentiment if you prefer. I hope you like the card, all the supplies used are linked below. Thank you for taking the time to visit.
Debbie x
Supplies used:
- White 6 x 6 inch blank card and envelope
- A4 smooth white card
- Neon Polishes Shocking Pink, Lava Orange
- Anti static pad
- Blossom clear stamp
- Perfect Medium clear ink pad
- Opaque White embossing powder
- Folding heat gun
- Pronty Crafts Oval Pattern stencil
- Square Frames nested die set
- Big Shot die cutting machine
- Permanent double sided tape dispenser