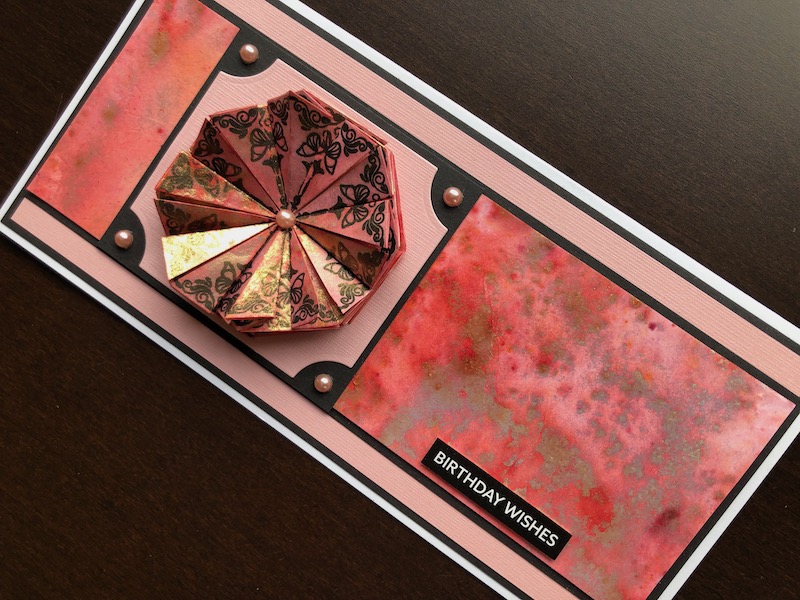
Hi, teabag folding has bee around for many years, I’m sure you have had a go at it at some time. The new range of dies and co-ordinating stamps from Creative Expressions have really taken
Hi, teabag folding has bee around for many years, I’m sure you have had a go at it at some time. The new range of dies and co-ordinating stamps from Creative Expressions have really taken it to a new level. Not only do they make it much easier to cut and fold the rosettes accurately but you can also add wonderful, stamped designs to them.

To Make The Card
There are three main steps to make this card, the first is to make your Pixie Sparkles card and paper. To do this, take and A4 sheet of standard printer paper and a piece of white card approx. 9cm x 21cm. Spritz both pieces with water to dampen them and sprinkle with Pixie Sparkles. You don’t need to cover the whole thing with powder as it will spread when you add more water. Spritz again and watch the powder burst into colour and spread around. Use a heat gun to dry it off, then repeat the process to fill in any gaps.
Now make the Teabag Folding rosette. When the Pixie Sparkles paper is completely dry stamp the teabag folding design onto it 8 times, then use the corresponding die to cut them out. You will see each shape has score lines on it to make the folding easier. Follow these instructions to make 8 folded pieces.

Cut a piece of card about 2 – 3cm square and spread a layer of glue on it. Adhere the 8 pieces to the card, slotting them in next to each other as you do. Add an adhesive pearl to the centre of the rosette. You may need to add some glue to the pearl to make it stick to the shiny surface of the paper. Set this aside until the rest of the card is completed.
Take a white DL sized blank card and layer it with black, then peach coloured card. Cut a piece of black card 7.5cm x 20cm and adhere it across the middle of the card. Trim your Pixie Sparkles card to 7cm x 20cm and adhere over the black panel. Cut another piece of black card to 7.3cm x 8cm, adhere this over the Pixie Sparkles panel towards the left side of the card. Die cut a rectangle with clipped corners from peach card and adhere over the black rectangle. Adhere the rosette to the centre of the die cut panel and add a self adhesive pearl to each corner. Cut a birthday sentiment from a sheet of black Wordies and adhere to the Pixie Sparkles panel with small foam pads.
It sounds like a lot of work when it’s all written down but it doesn’t take too long and isn’t difficult. I really think the result is worth it. Of course you could use the card for any number of occasions by adding a different sentiment. Also although the rosette is 3D it will lay flat for to go in an envelope. Thank you for reading, I hope you like the card and are inspired to give teabag folding another go. All the products used are linked below.
Debbie x
Products used:
- White DL blank card and envelope
- A4 Black Foundation card
- A4 Coconut White Foundation card
- Printer paper
- Peach coloured card
- Coral Crush Pixie Sparkles
- Teabag Folding die set Octagons
- Teabag Folding stamp set Octagons
- Big Shot die cutting machine
- Versafine Onyx Black ink pad
- Wordies Birthday sentiment strip sheets
- Labels 59 die set
- 5mm pink self adhesive pearls
- Double sided tape dispenser
- Cosmic Shimmer dries clear glue
- 1mm adhesive foam pads

