
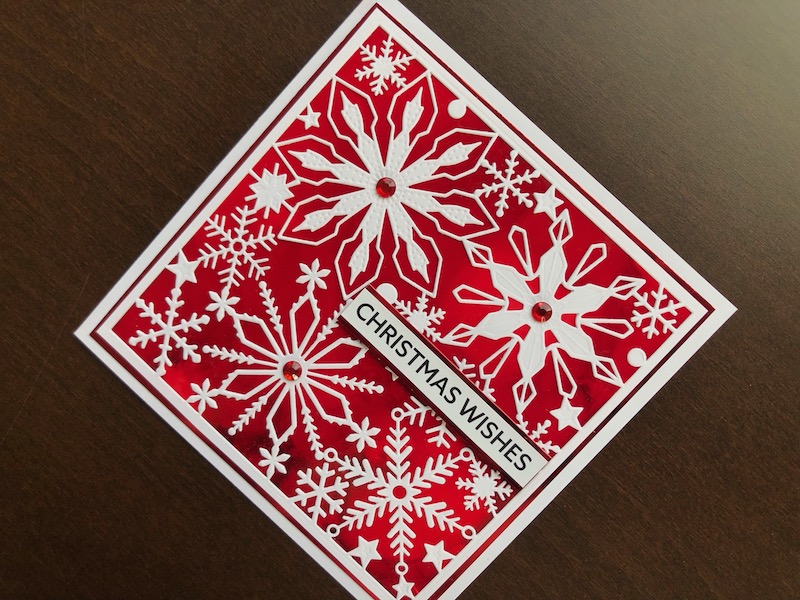
Hi, I wanted to use this Snowflake background die and thought that a simple inked background would show it off perfectly. With such detail in the snowflakes a simple sentiment seemed the best idea. To
Hi, I wanted to use this Snowflake background die and thought that a simple inked background would show it off perfectly. With such detail in the snowflakes a simple sentiment seemed the best idea.

To Make The Card
Start with the inked background, cut a piece of Yupo paper 12.5cm square, then add drops of red alcohol ink and blending solution. Move the inks around with a blower and add more drops of red and blending solution until the Yupo paper is covered and you have various shades of red. Set this aside to dry.
The snowflake background die cuts the design into the card, it does not cut the square outline. Take a piece of white card approx. 13cm square and die cut the snowflake design into it. Trim the piece down to create even sized borders so that the overall size is approx. 12.75cm.
Trim a white 6″ x 6″ blank card to 14cm square and layer it with red mirror card. Cut the Christmas Wishes sentiment from the Wordies Sentiment sheet and layer it on red mirror card. When the inked background is dry glue the snowflake panel to it, then adhere the panel to the card front over the red mirror card. Use thin foam pads to adhere the sentiment to the right hand side of the card. Finish off with a red self adhesive crystal in the centre of each of the larger snowflakes.
I am pleased with the end result, the intricate snowflake design stands out well against the background. Thank you for visiting, I hope you like it too. All the products used are linked below.
Debbie x