
Hi here’s another of my quick Christmas cards, that is also easy to make. You might recognise the colour scheme from this earlier card. I had some die cut circles left over from that card
Hi here’s another of my quick Christmas cards, that is also easy to make. You might recognise the colour scheme from this earlier card. I had some die cut circles left over from that card so decided to use them up on this one. I have wanted to make this style of card for a while so it seemed the ideal time to try it out.

To Make The Card
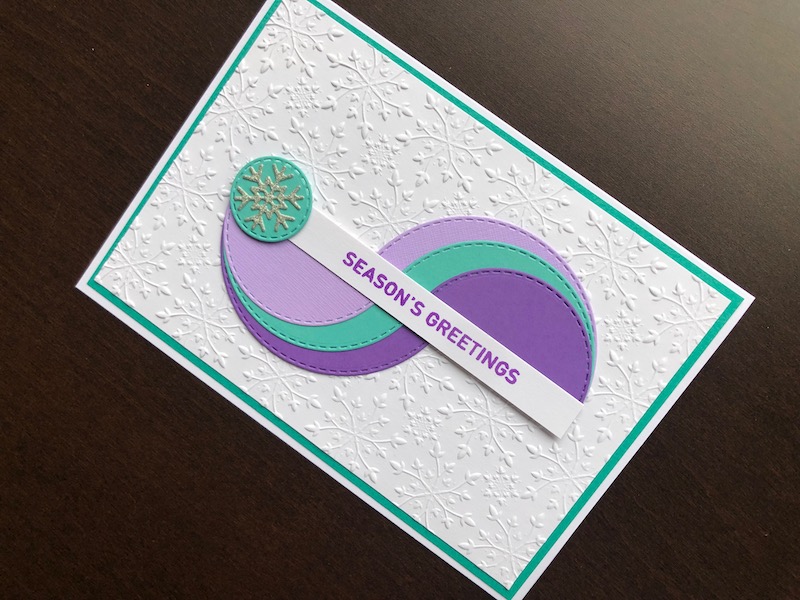
Start with a white 5″ x 7″ blank card and trim it down to 11.5cm x 16.5cm, add a layer of turquoise card 11cm x 16cm. Cut a piece of white card 10.5cm x 15.5cm and emboss it with the snowflake background embossing folder. Adhere the embossed panel over the turquoise layer. Cut 2 purple stitched circles, 1 x 7.5cm diameter and 1 x 5.5cm diameter. Cut two stitched circles from lilac card the same sizes as the purple ones. Finally cut a turquoise circle 6.5cm diameter. Use a paper trimmer to cut each of the circles in half. Glue the half circles together to create two layered pieces with the smallest half circles on top, offset to one side. Position the two half circle layers above and below each other, line up the ends of the turquoise circles to get the position just right. Use adhesive tape to adhere them to the card front.
Die cut a small 2.5cm stitched circle from turquoise card and a snowflake from silver glitter card. Glue the snowflake to the small circle. Stamp the sentiment in purple ink on a strip of white card approximately 11cm long. Glue the sentiment strip in place so that the right hand end is lined up with the edge of the half circles. Use thin adhesive foam pads to attach the snowflake circle to the other end, following the curve of the circles and overlapping the end of the sentiment strip.
There it is, quick and easy. You could, of course, use plain circles rather than stitched and any colour scheme you like. I am pleased with the way it turned out, specially as I was able to use up some surplus die cut circles. Thank you for your interest. All the products used are linked below.
Debbie x
Products Used
- White 5″ x 7″ blank card and envelope
- Purple, lilac and turquoise card
- A4 Coconut White foundation card
- Silver glitter card
- Snowflake background embossing folder
- Big Shot die cutting machine
- Nested Stitched Circles die set
- Extendable paper trimmer
- Snowflakes die set
- Christmas Sentiment Strips clear stamp set
- Press to Impress stamp positioning tool
- Wilted Violet distress oxide ink pad
- Double sided tape dispenser
- Dries clear glue
- 1mm adhesive foam pads