
Hi, I was looking at the colour schemes of the Christmas cards that I have made so far this year and realised that I have used a lot of classic red, green and gold. I
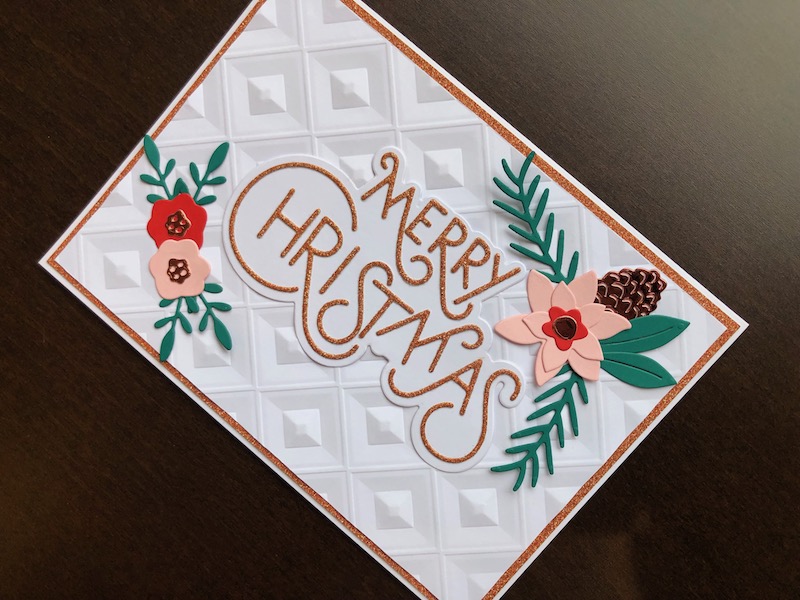
Hi, I was looking at the colour schemes of the Christmas cards that I have made so far this year and realised that I have used a lot of classic red, green and gold. I decided for this card to do something different and thought that the little pine cones would look great cut from copper mirror card. This led me to probably the most unusual Christmas colour scheme I have ever come up with. I have to say I really like it, what do you think??

To Make The Card
Start with a white 5″ x 7″ blank card and trim it slightly to make it 12.5cm x 17.5cm, this makes it much easier to measure the layers. Add a layer of copper glitter card 12cm x 17cm, then cut a piece of white card 11.5cm x 16.5cm. Emboss the white card with the Bevelled Diamonds embossing folder and adhere over the copper glitter card layer. Cut the background for the sentiment from white card and the letters from copper glitter card. Glue the letters to the background, this can be a bit fiddly but I found it easiest to glue the ones with the curves first and add the other letters in afterwards. Top tip! The two letters “S” are different shapes and sizes so are not interchangeable!! Once all the letters are glued in place, glue the whole thing to the centre of the card.
Die cut pine branches and various leaves from dark turquoise card, flowers from pink and red card and a pine cone from copper mirror card. Also cut the flower centres from copper mirror card. Arrange the flowers and foliage on either side of sentiment. When you are happy with the layout, glue them in place.
This is quite an easy card to make, and of course you can change the colour scheme if you don’t think the copper colour is Christmassy enough 🙂 Thank you for visiting, if you would like to make it for yourself, all the products used are linked below.
Debbie x
Products Used
- White 5″ x 7″ blank card and envelope
- Festive Tones A4 No Shed glitter card
- A4 Bright White card stock
- Pink, red and dark turquoise card stock
- A4 Copper mirror card
- Extendable paper trimmer
- Bevelled Diamonds embossing folder
- Big Shot die cutting machine
- Stylish Merry Christmas die set
- Make It Merry Christmas Florals die set
- Dries clear glue