
Hi, this is the first time I have used ink in an embossing folder, and apart from needing to re-ink and run through for a second time it all went very smoothly. The finish is
Hi, this is the first time I have used ink in an embossing folder, and apart from needing to re-ink and run through for a second time it all went very smoothly. The finish is not perfect but I feel that is OK and adds to the overall appearance.

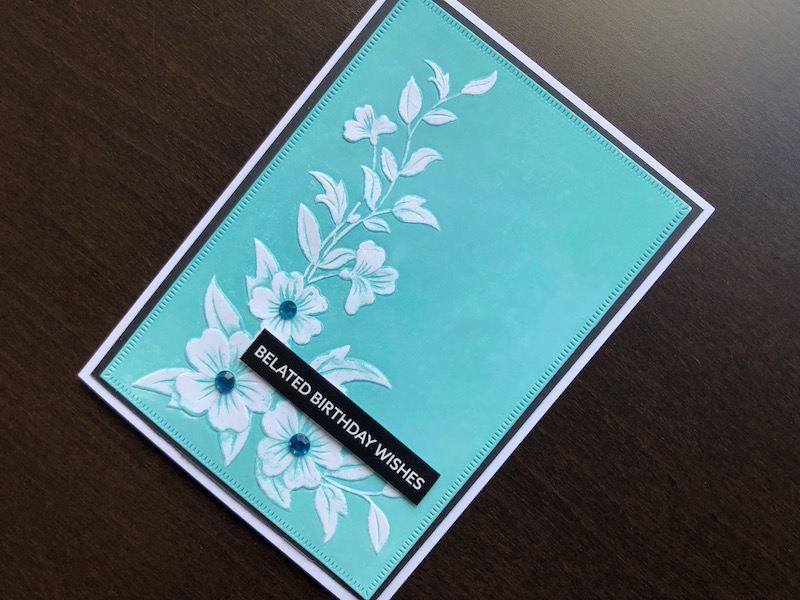
To Make The Card
Start with a white A6 blank card, trim it to 10.5cm x 14.5cm, then layer it with black card. Cut a piece of white card approximately 10cm x 14cm. Open the embossing folder and apply ink to the flat side, (i.e. where the design is recessed), by swiping the ink pad across the surface. Put the white card in the embossing folder and run through a die cutting machine. If you do not have sufficient ink coverage, re-ink the folder, put the card back in using the raised part of the design to get the correct position and run it through again. Repeat until you are happy with the ink coverage.
Use a die to cut the embossed card into a 9.5cm x 13.5cm rectangle with crimped edges. Adhere the embossed panel to the front of the card. Add a self adhesive crystal to the centres of each of the three main flowers. Cut the Belated Birthday Wishes sentiment from the Wordies sheet. Run a black marker pen around the edges to stop any white being visible. Adhere the sentiment to the card with thin adhesive foam pads.
I am very pleased with the results of this technique and will definitely use it again, I want to experiment with different card and ink combinations. Thank you for visiting, I hope you like it too. All the products used are linked below.
Debbie x
Products Used
- White A6 blank card and envelope
- A4 Foundation card black
- A4 Coconut White card
- Extendable paper trimmer
- Flower Corner 3D embossing folder
- Distress Oxide ink pad Salvaged Patina
- Big Shot die cutting machine
- Nested Rectangles with Small Stripes die set
- Self adhesive crystals blue/turquoise
- Birthday Wordies sentiment sheet
- Black marker pen
- Double sided adhesive tape dispenser
- 1mm adhesive foam pads